


, Facebook and Mastodon for free – GIGAZINE")
Mixpost is a tool that allows you to manage multiple accounts for different SNS like X, Facebook, Mastodon, etc. simultaneously. In addition to synchronous publishing, it is also possible to publish at a specific time, so I hosted it myself and tried to use it.
Self-hosted and open source social media management – Mixpost
https://mixpost.app/
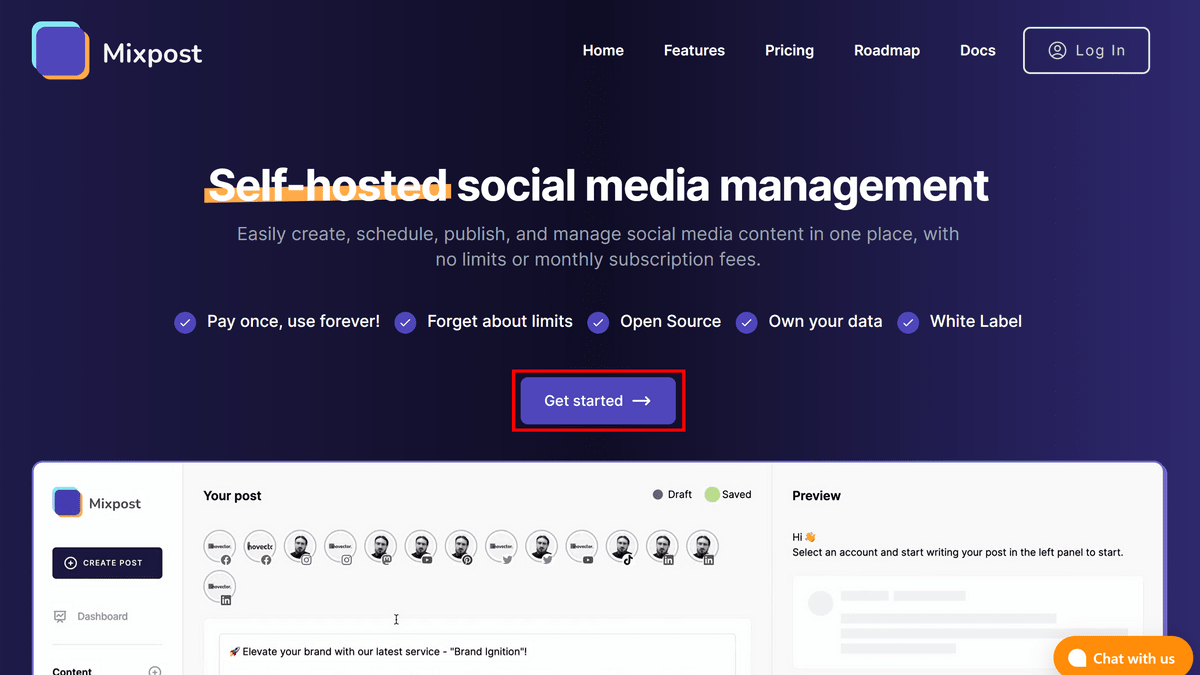
Go to the official website and click “Get Started”.
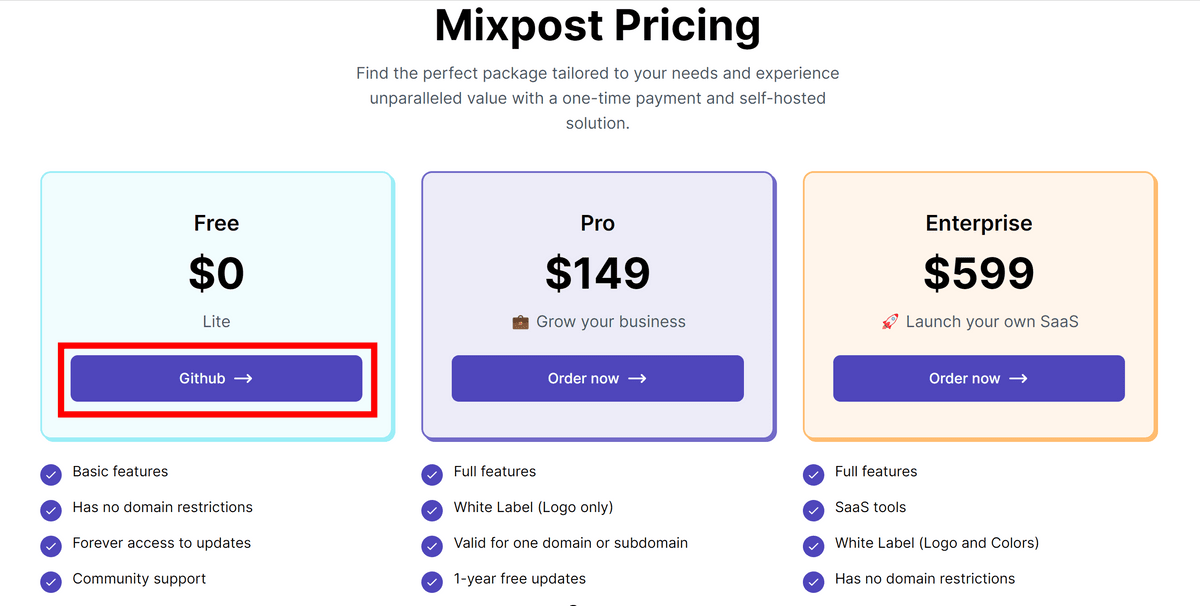
Click on “Github” displayed in the “Free” column.
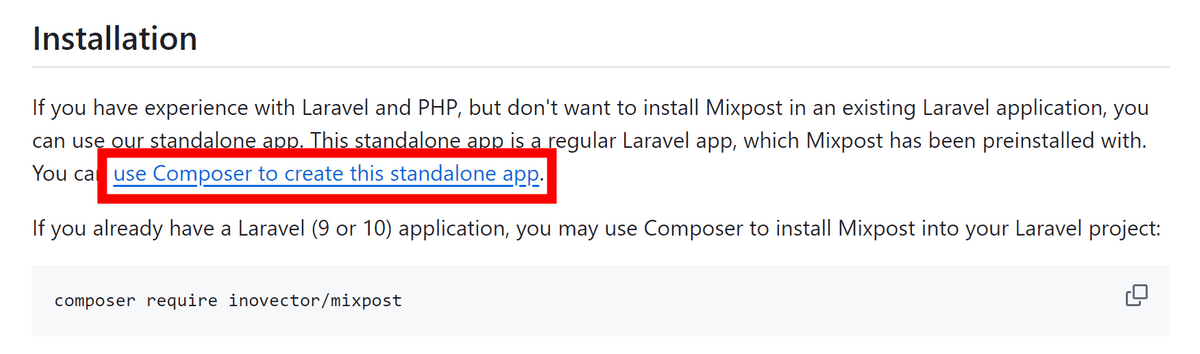
It is possible to add it to a Laravel application, but since we will be using the standalone app version this time, click “Use Composer to create this standalone app”.
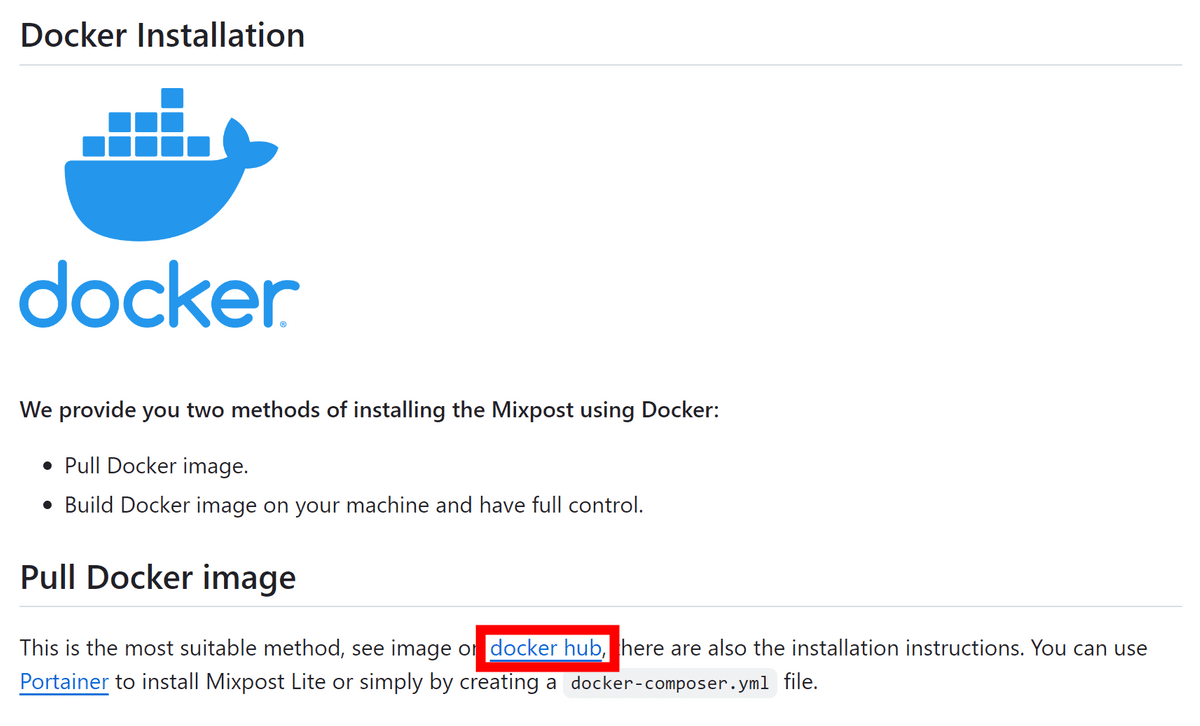
Moreover, this time we will be using the Docker version. For more information about Docker versioning, seeDocker CenterYou can check by clicking on the link.
Also, if Docker is not installed on the server, install it previously by referring to the document below.
Install Docker engine Docker documentation
https://docs.docker.com/engine/install/
This time, to use Debian, I entered the following command.
sudo apt-get update
sudo apt-get install ca-certificates curl gnupg

sudo install -m 0755 -d /etc/apt/keyrings
curl -fsSL https://download.docker.com/linux/debian/gpg | sudo gpg --dearmor -o /etc/apt/keyrings/docker.gpg
sudo chmod a+r /etc/apt/keyrings/docker.gpg

echo \
  "deb [arch="$(dpkg --print-architecture)" signed-by=/etc/apt/keyrings/docker.gpg] https://download.docker.com/linux/debian \
  "$(. /etc/os-release && echo "$VERSION_CODENAME")" stable" | \
  sudo tee /etc/apt/sources.list.d/docker.list > /dev/null

sudo apt-get update
sudo apt-get install docker-ce docker-ce-cli containerd.io docker-buildx-plugin docker-compose-plugin
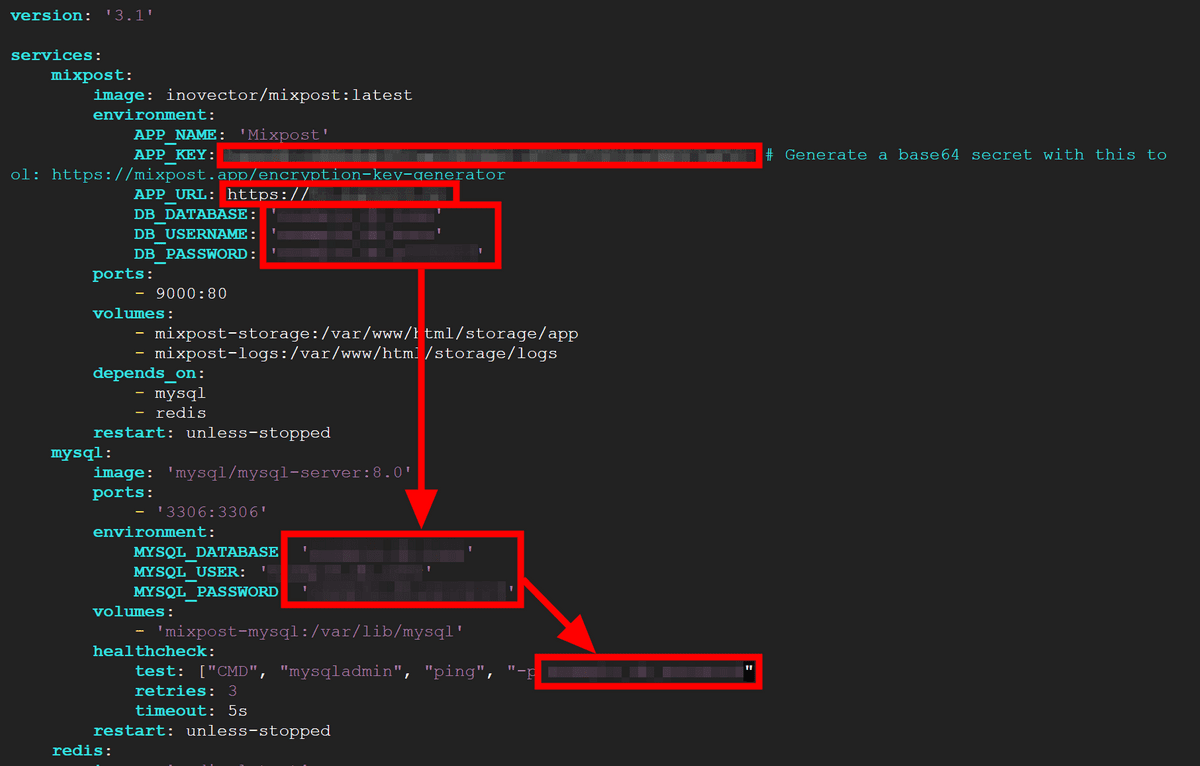
Also set APP_KEY, which is required during setup.Official toolsCreate and copy it.

documentCopy the example described in and save it as “docker-compose.yml”.

Open docker-compose.yml in a text editor and paste the APP_KEY you created earlier into the APP_KEY field. Enter the hosting URL in APP_URL, create and enter the database name, username and password in the DB_DATABASE, DB_USERNAME and DB_PASSWORD fields. After entering the same database name, username and password for MYSQL, set the same password in the validation field.
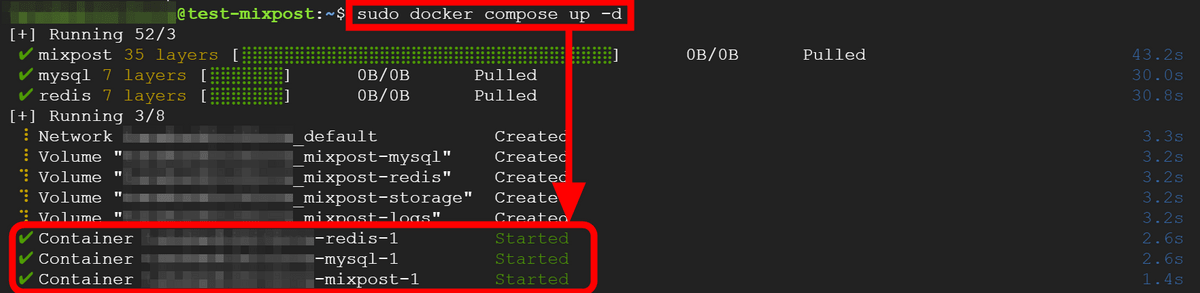
Enter the command below to start Mixpost.
sudo docker compose up -d
As shown in the diagram below, setup is complete when the three containers “redis”, “mysql” and “mixpost” are started.
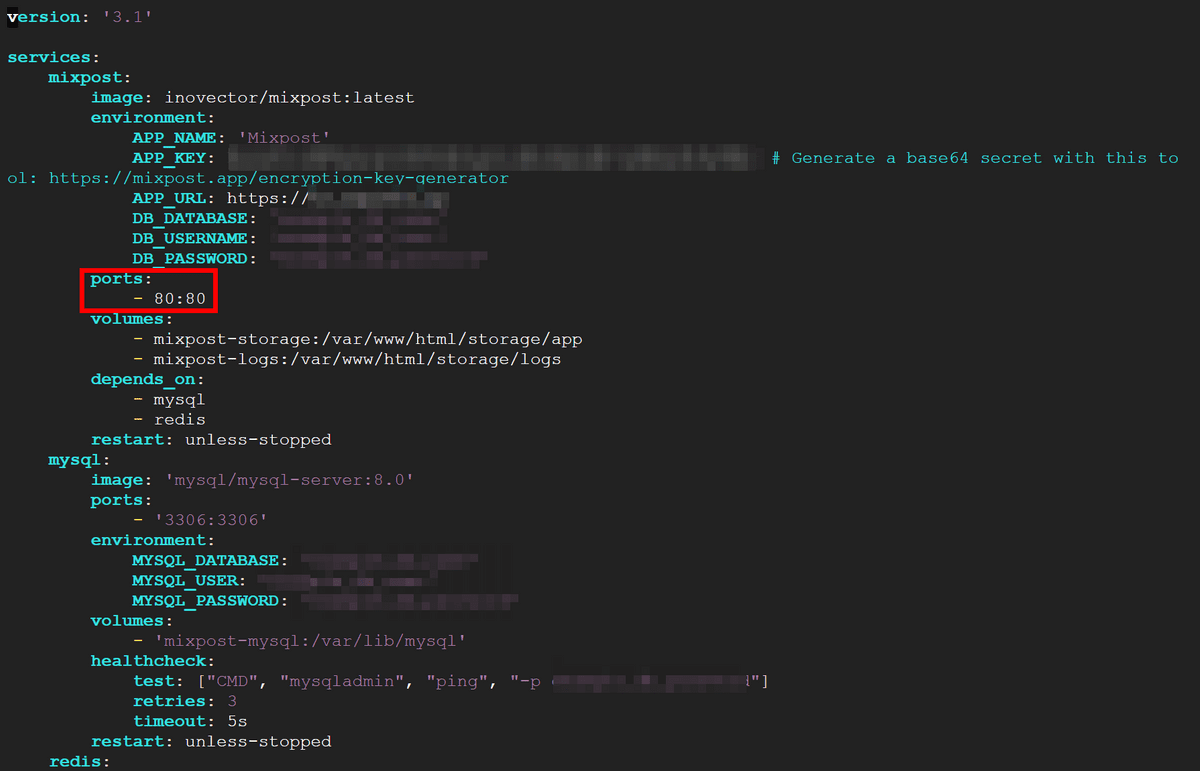
However, when I tried to access the server, the connection failed. If you look at the configuration file again, you'll find that the port setting is now 9000. You can modify the URL, but this time you've changed the port number to 80.
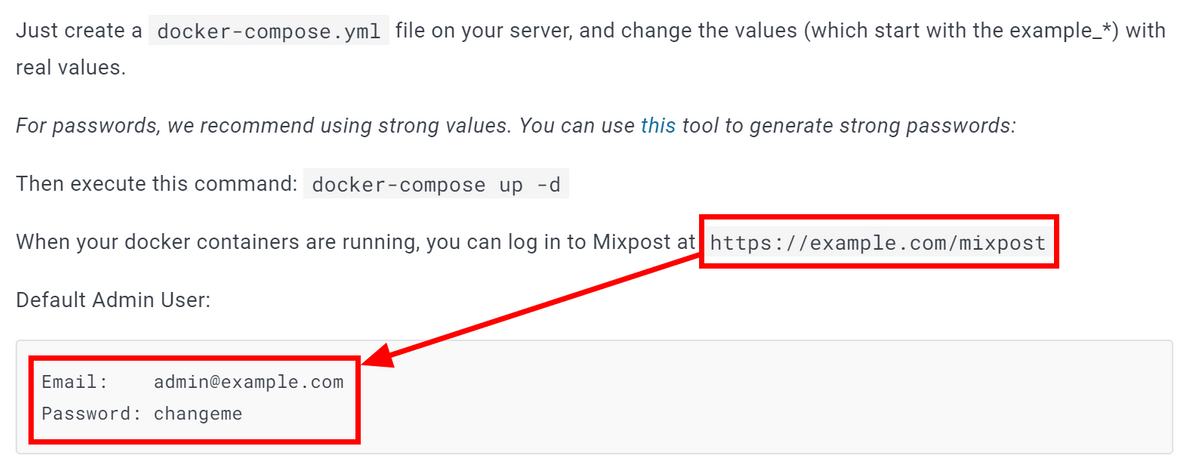
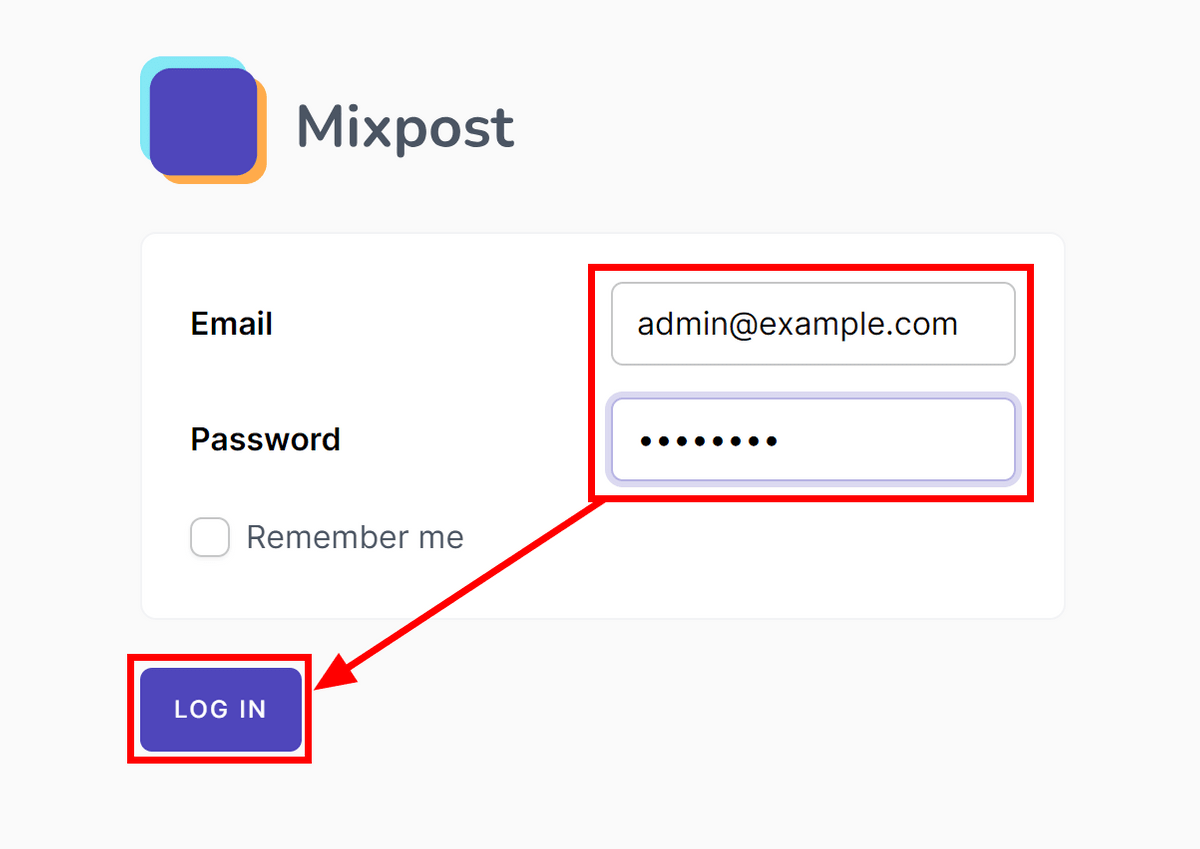
After checking the documentation, it says that after the server starts, “[サーバーのURL]You can access mixpost by accessing “/mixpost''. The administrative user's email address is:[email protected]” states that the password is set to “changeme”.
To access as instructed, enter the administrative user's email address and password, and click “Sign in.”
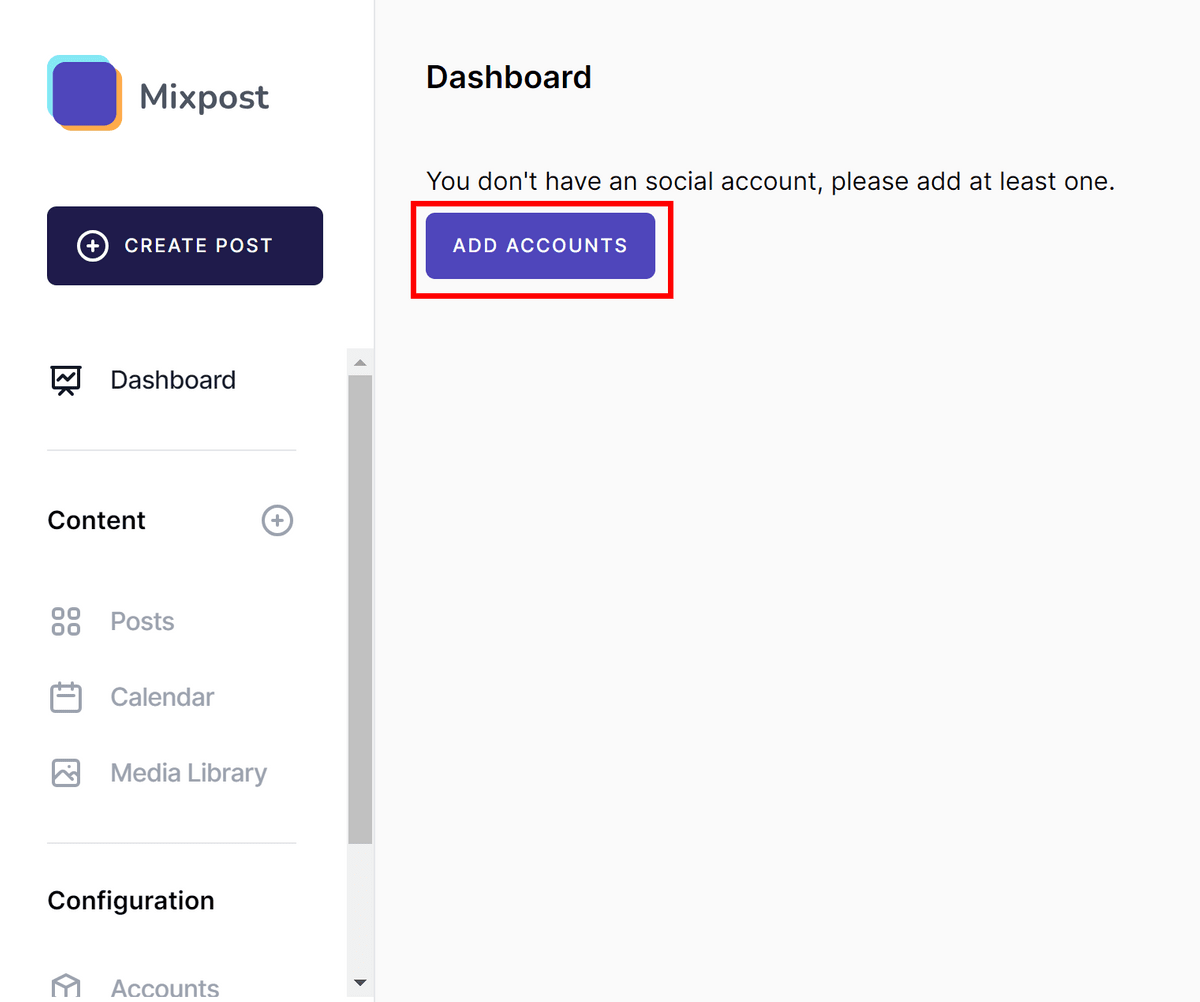
First you need to register an SNS account. Click “Add Accounts”.
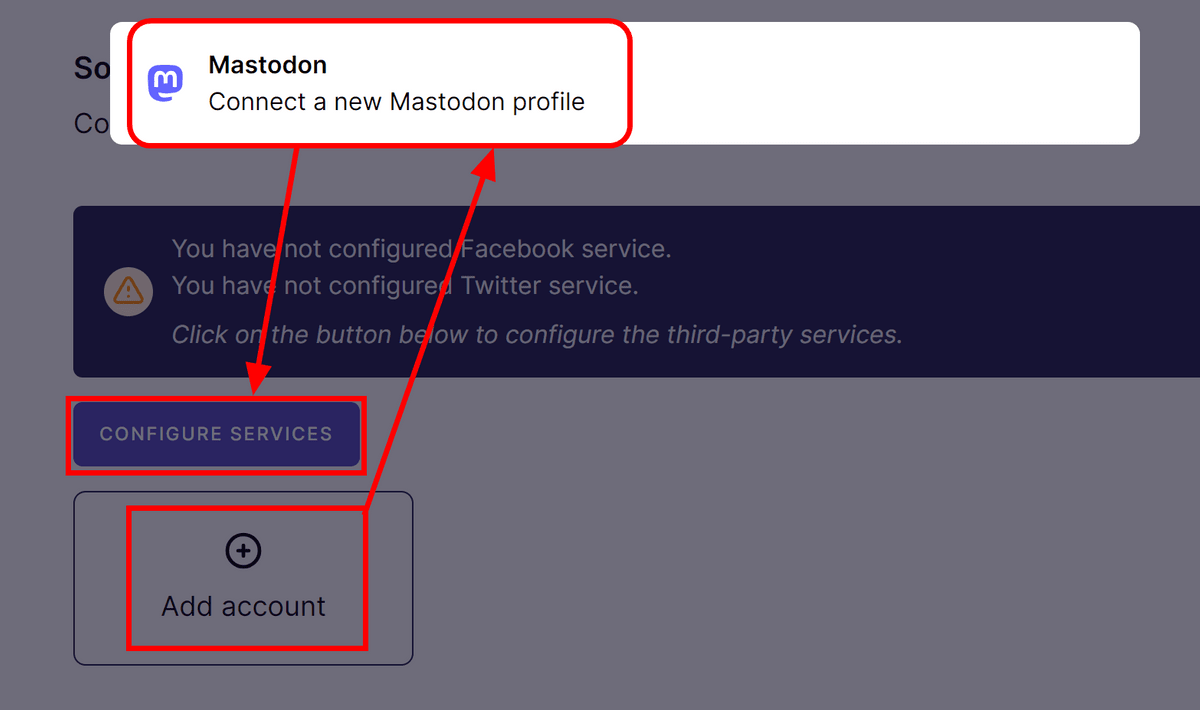
It has been shown that additional settings are needed to add Facebook and Twitter accounts (currently X).

If you click “Add Account” in this case, you will be able to add Mastodon. This time, to add Account X (formerly Twitter), click Configure Services.
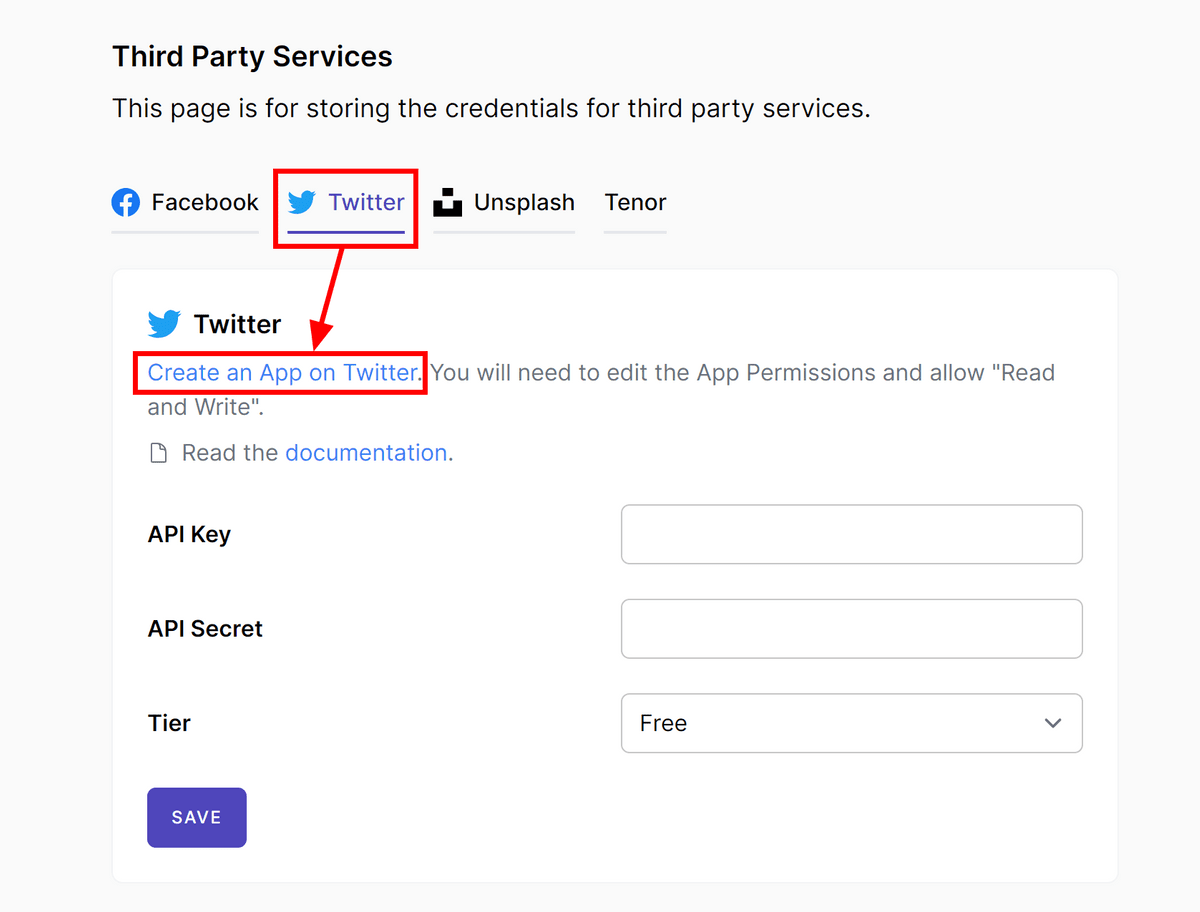
Click “Twitter” and then “Create a Twitter app.”
Click “Sign up for a free account.”
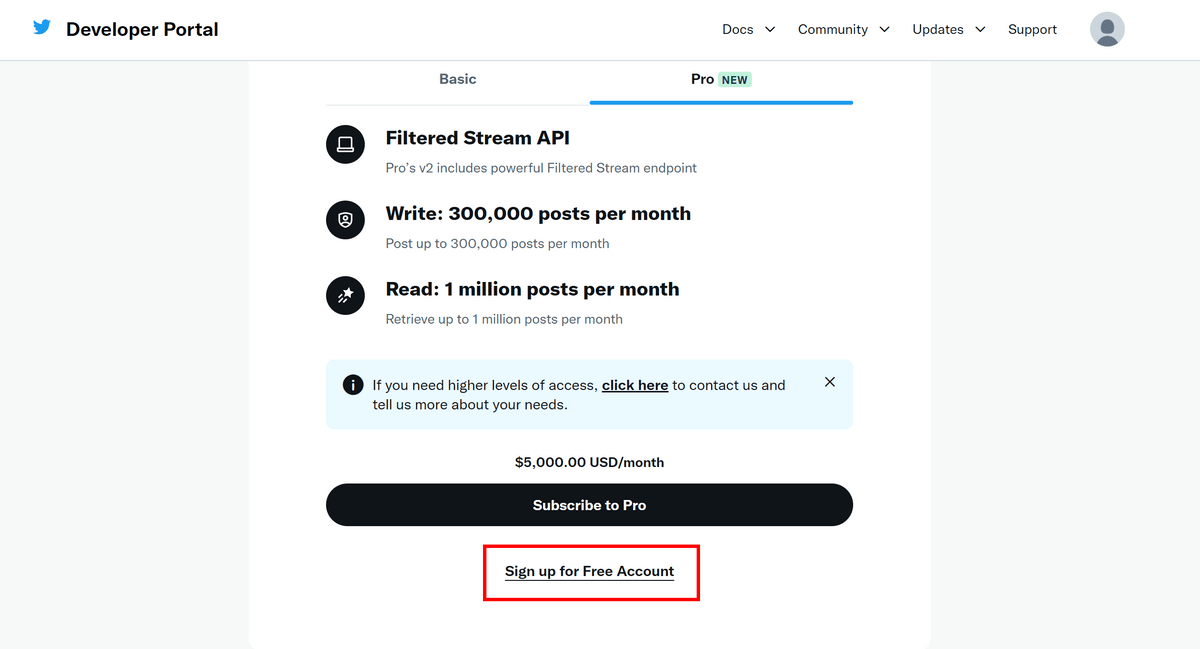
A field appears where you can enter how you plan to use your Twitter data and API.
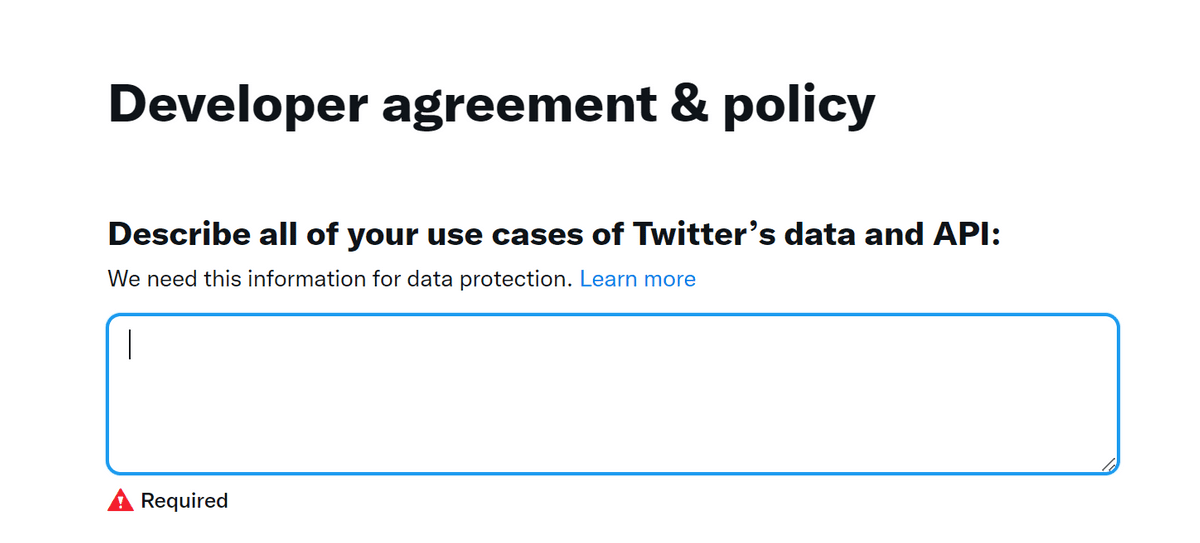
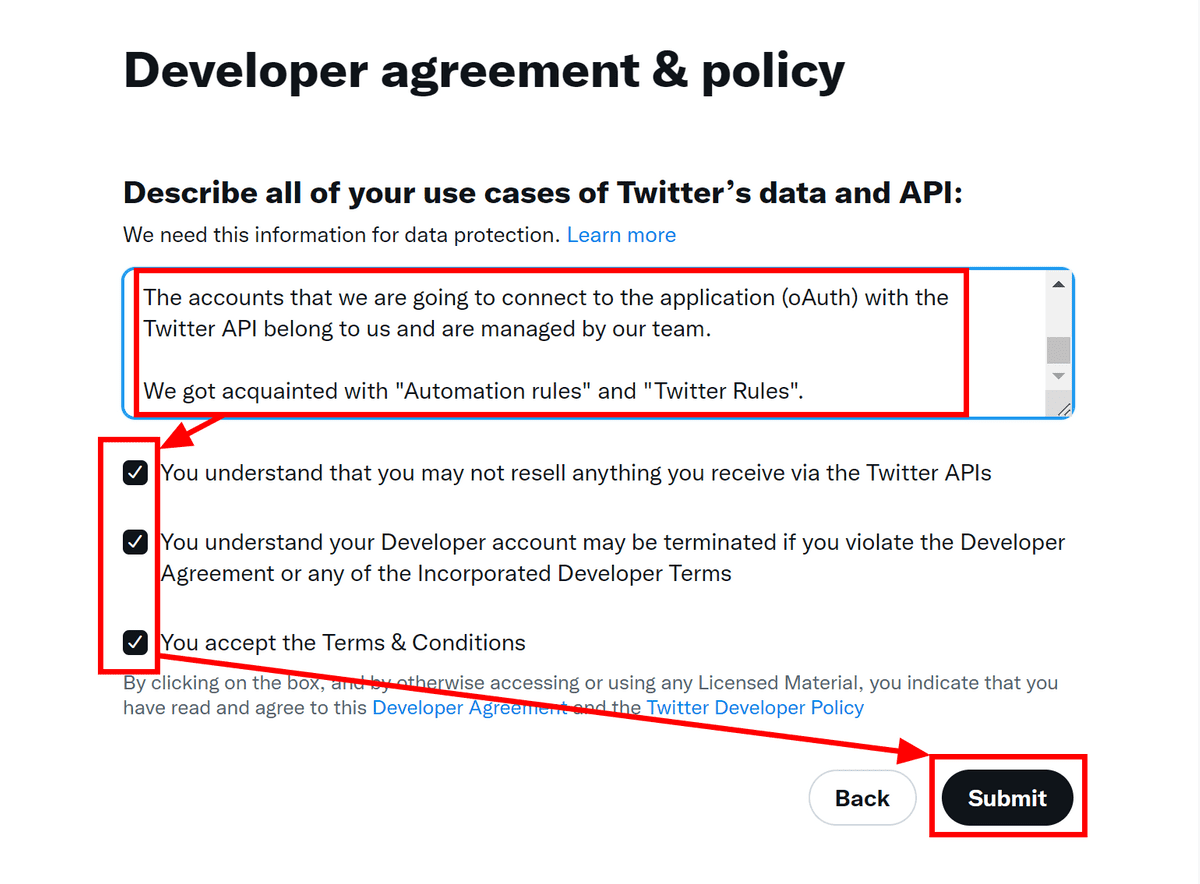
documentThere is an example sentence in it, so please copy it.

Paste it into the previous input field, select all the checkboxes and click “Submit”.
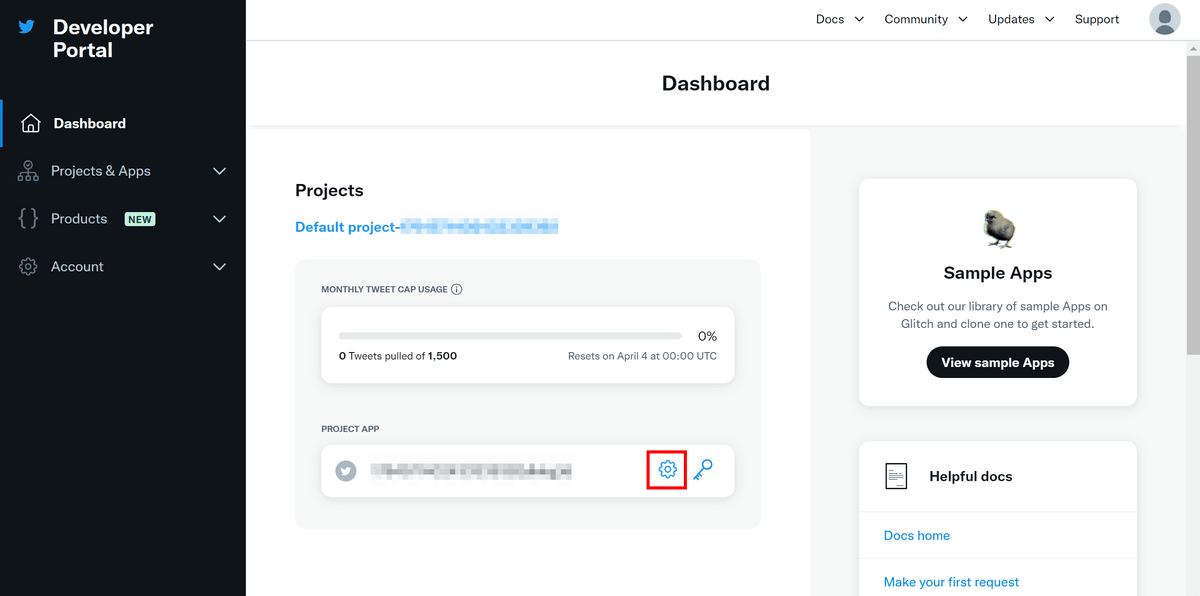
You will automatically be redirected to the project screen, so click on the gear icon.
Click Setup in the User Authentication Settings column.

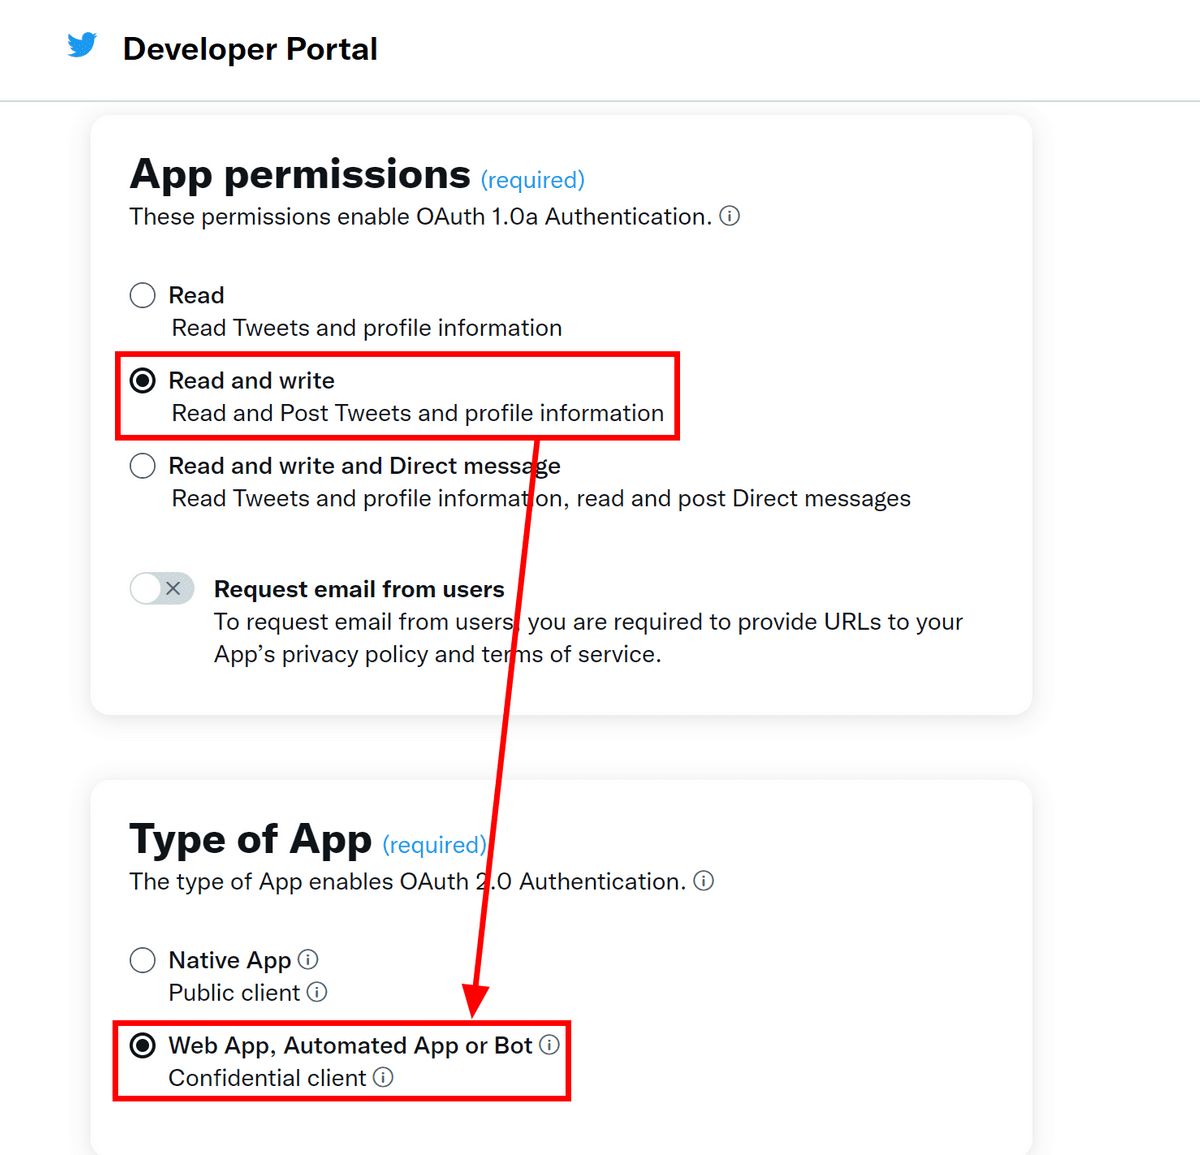
Change the app permissions to “Read & Write” and change the app type to “Web App, Automated App, or Robot”.
Scroll down and enter “Callback URI/Redirect URL” in App Info.[サーバーのURL]/mixpost/callback/twitter”. Also enter the server URL in the website URL.

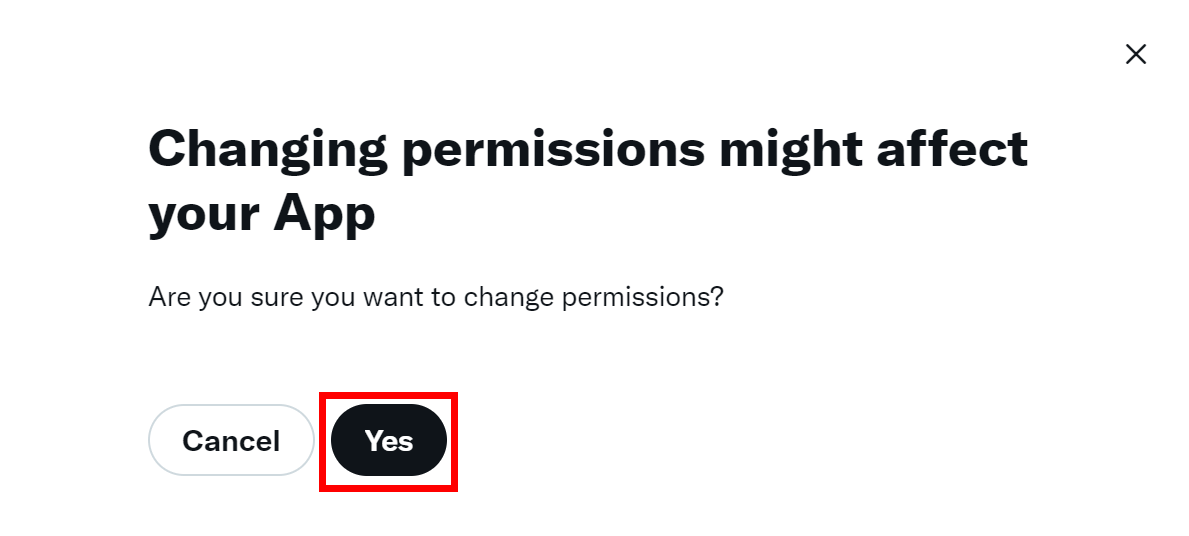
Go through all the remaining settings and click “Save” at the bottom.

Click “Yes” to confirm.
The OAuth 2.0 client ID and client secret are displayed. There is no need to save it if you only use it for mixpost. Click Done.
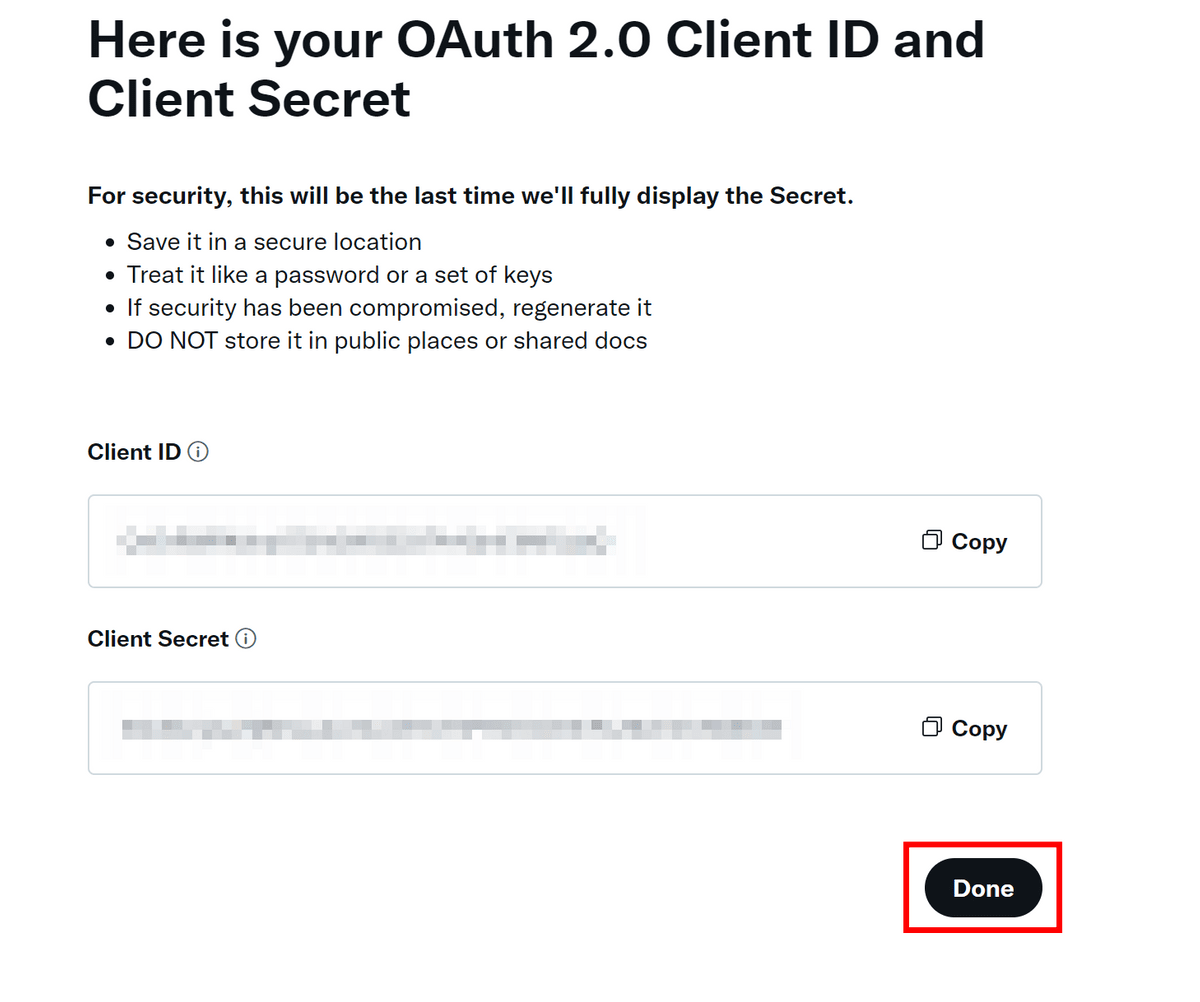
Click Yes, I have saved it.

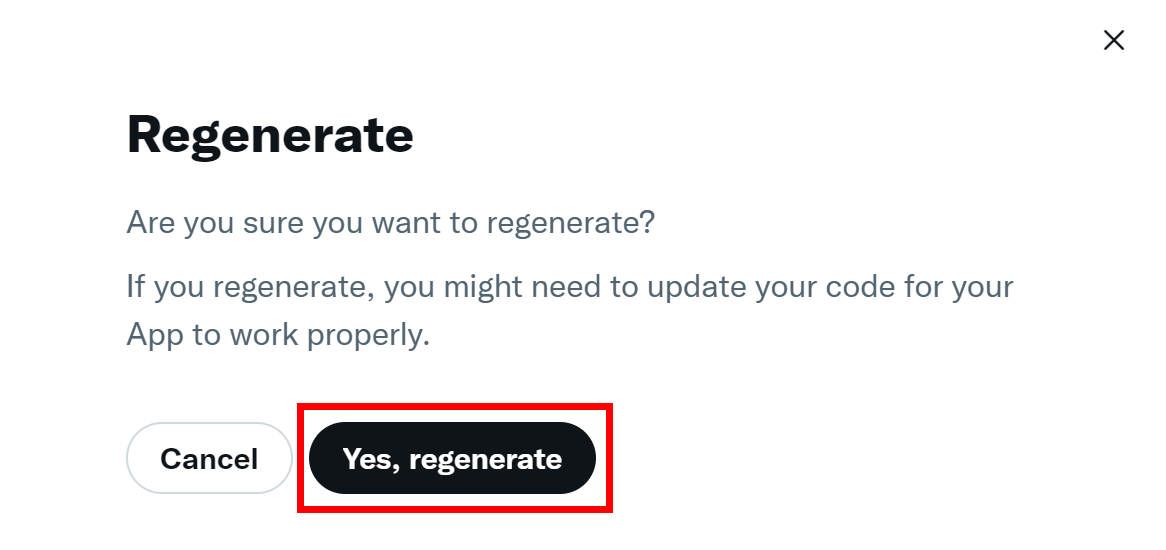
Go back to the project page, click “Keys and Tokens” and then click “Rebuild.”

Click Yes, Rebuild.
The API Key and API Secret Key will be displayed, so copy them both.
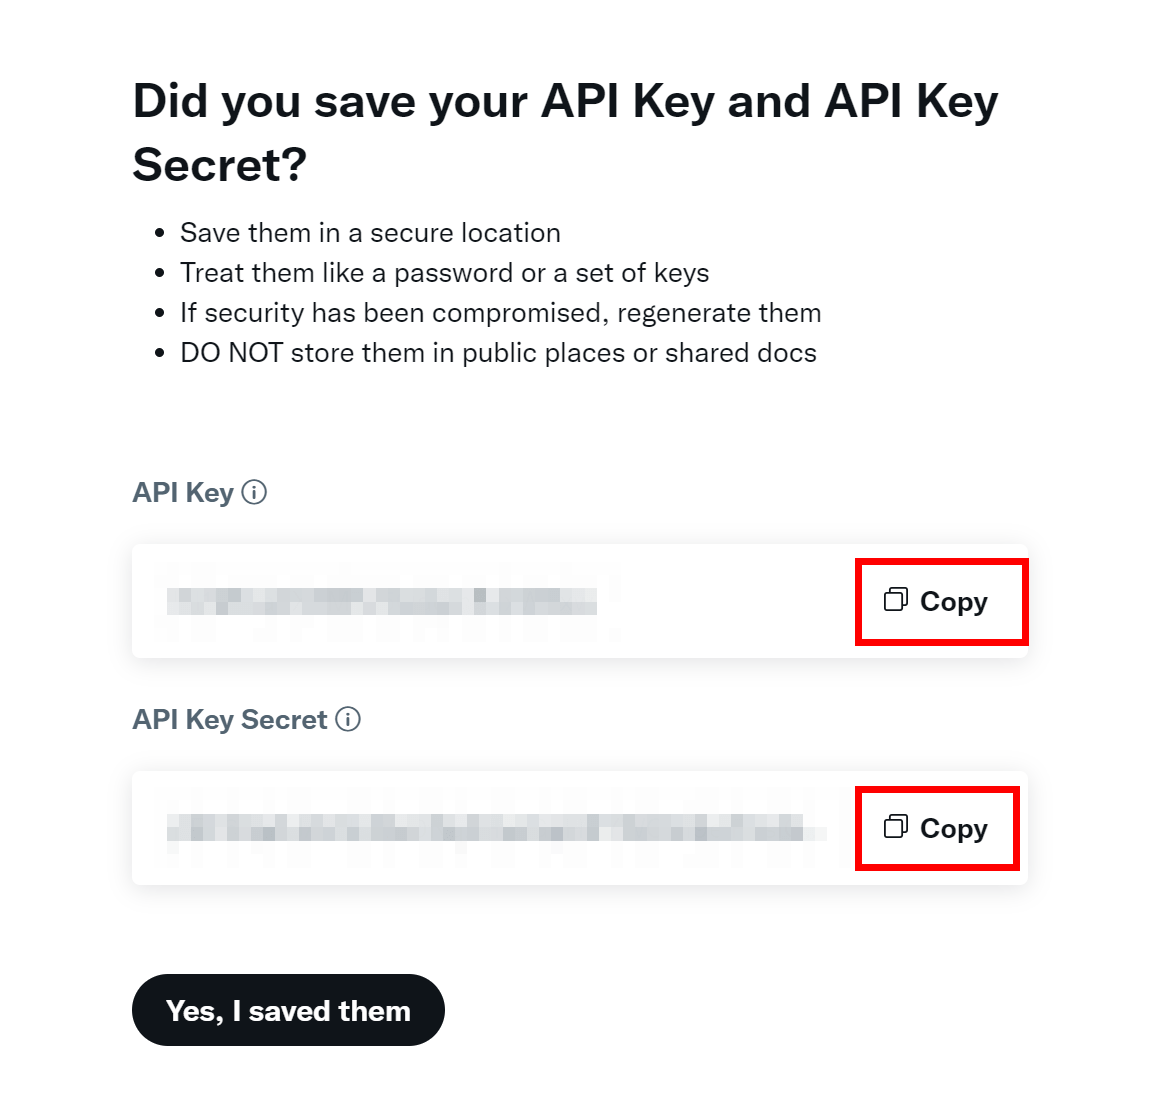
Return to the Mixpost screen, paste both into the API Key and API Secret fields, and click Save.

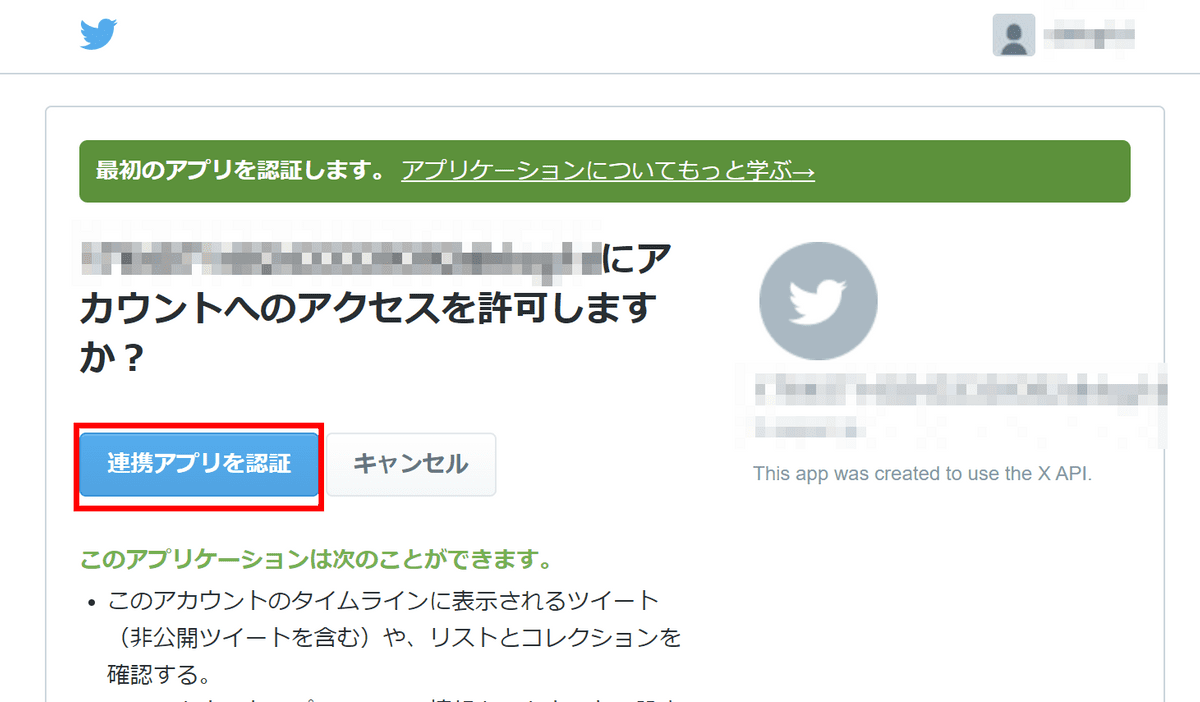
First, log in to the X (formerly Twitter) account you want to link from your browser. Next, click “Add Account” from “Accounts” and “Twitter” will be added to the options, so click on it.

Click “Authenticate linked app.”
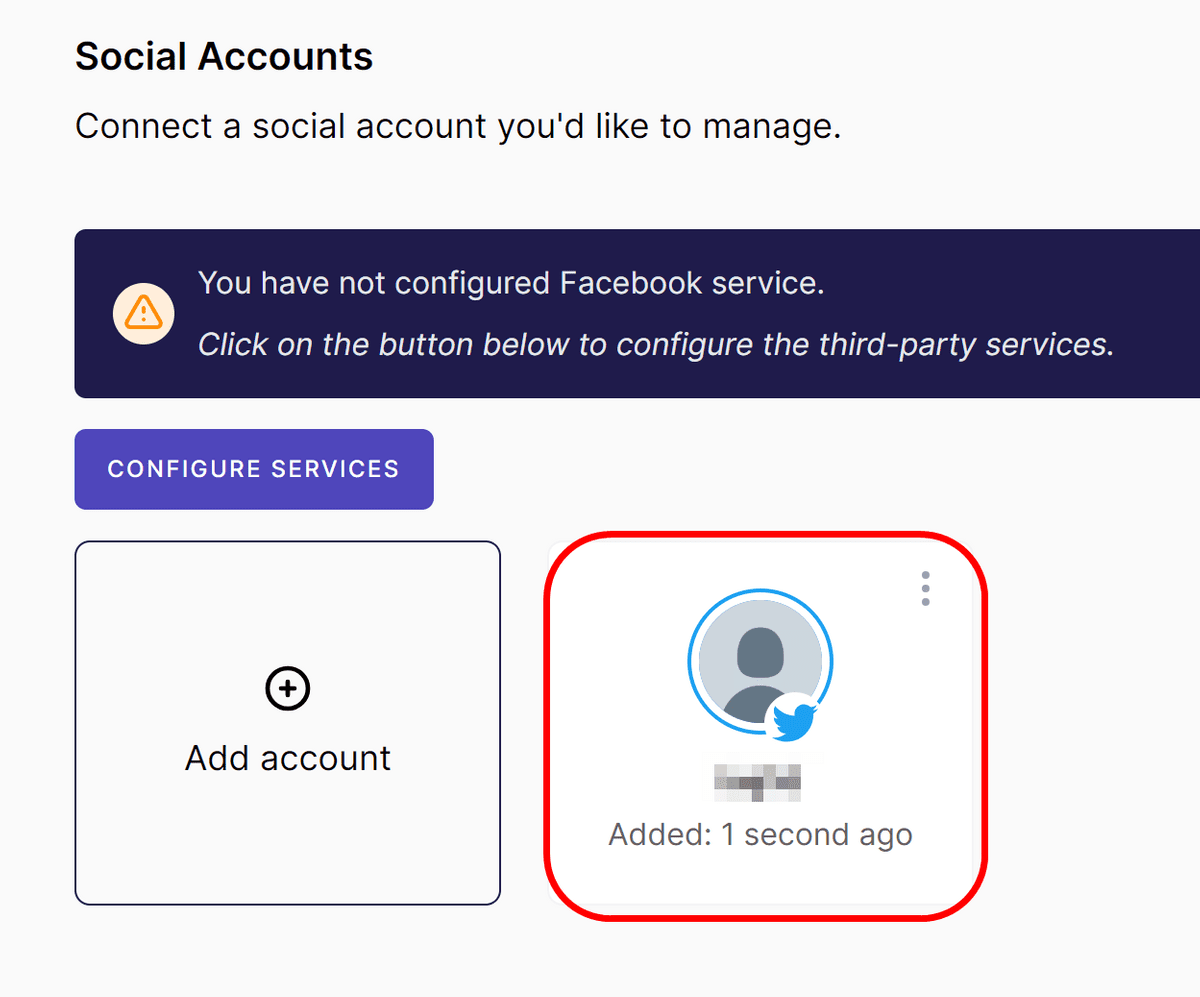
Account added.
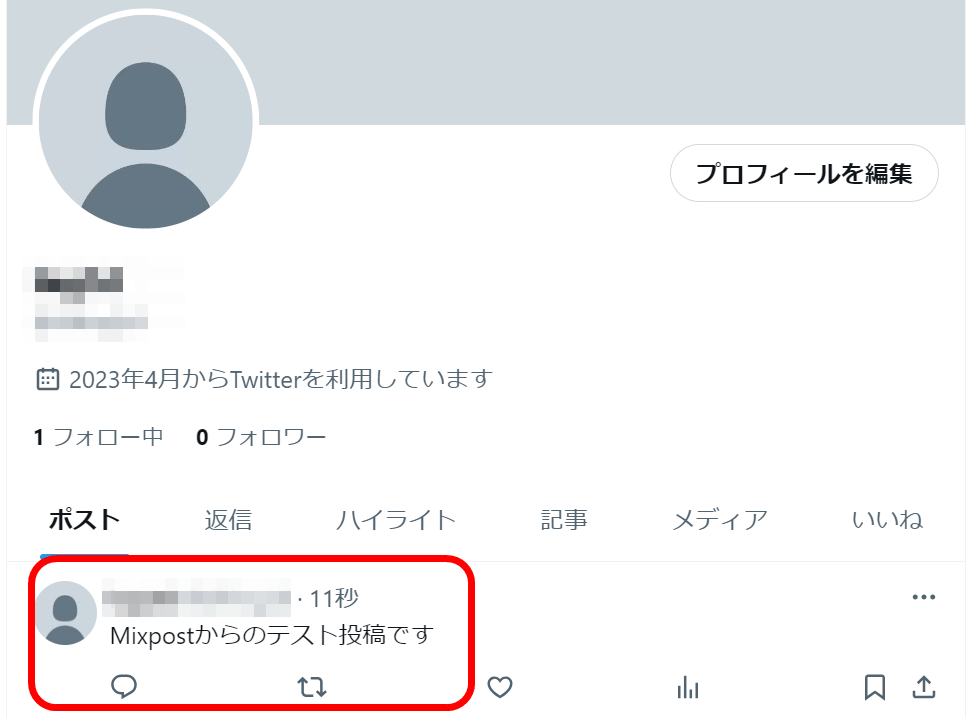
I'll try posting from Mixpost right away. Click Create Post and select the account you want to use to post. As you enter the post content, a preview will be displayed on the right, so if there is no problem, click “Publish Now”.

A confirmation screen will appear, so click Publish Now.

When I looked at the X (old Twitter) screen, I saw that the post had been published successfully.
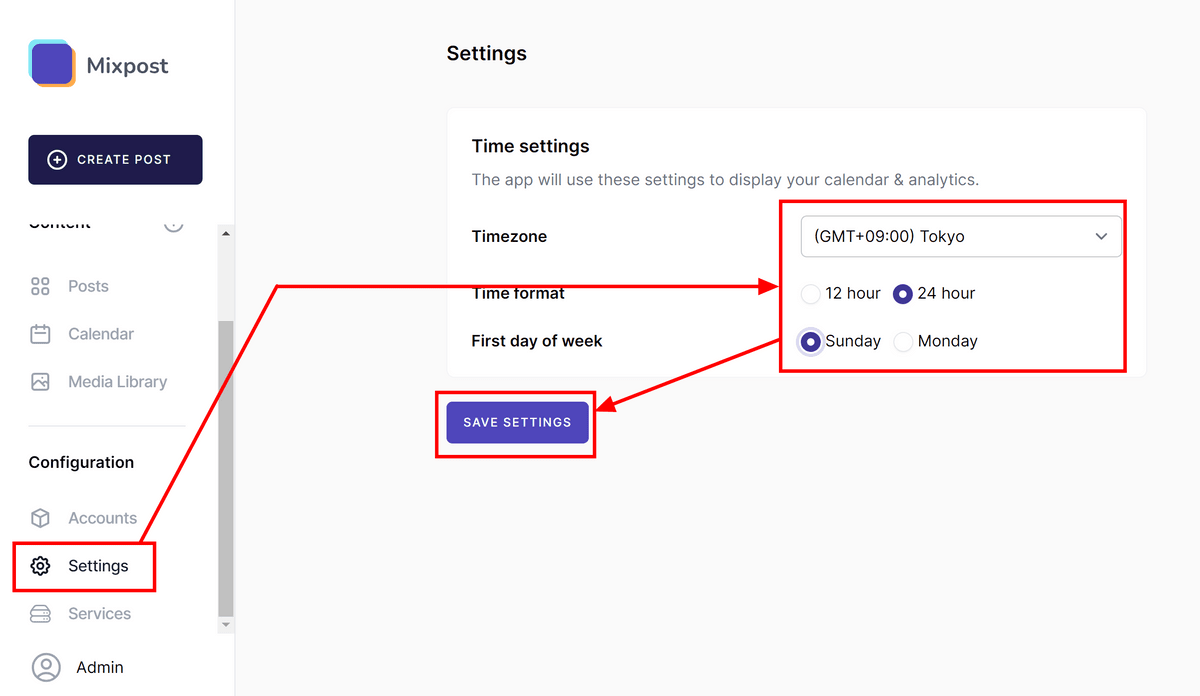
You can set the time by opening Settings. This time, I set the settings to “Tokyo Time,” “24-hour clock,” and “One week starting from Sunday,” and then clicked “Save Settings.”
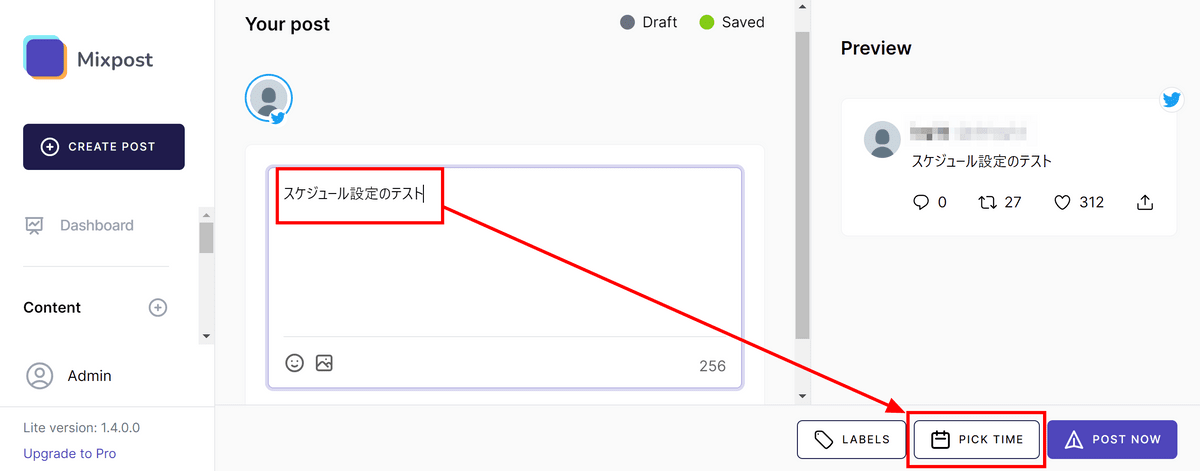
Now that you've set the time, let's try scheduled publishing. After entering the post content like a regular post, click “Choose Time” this time.
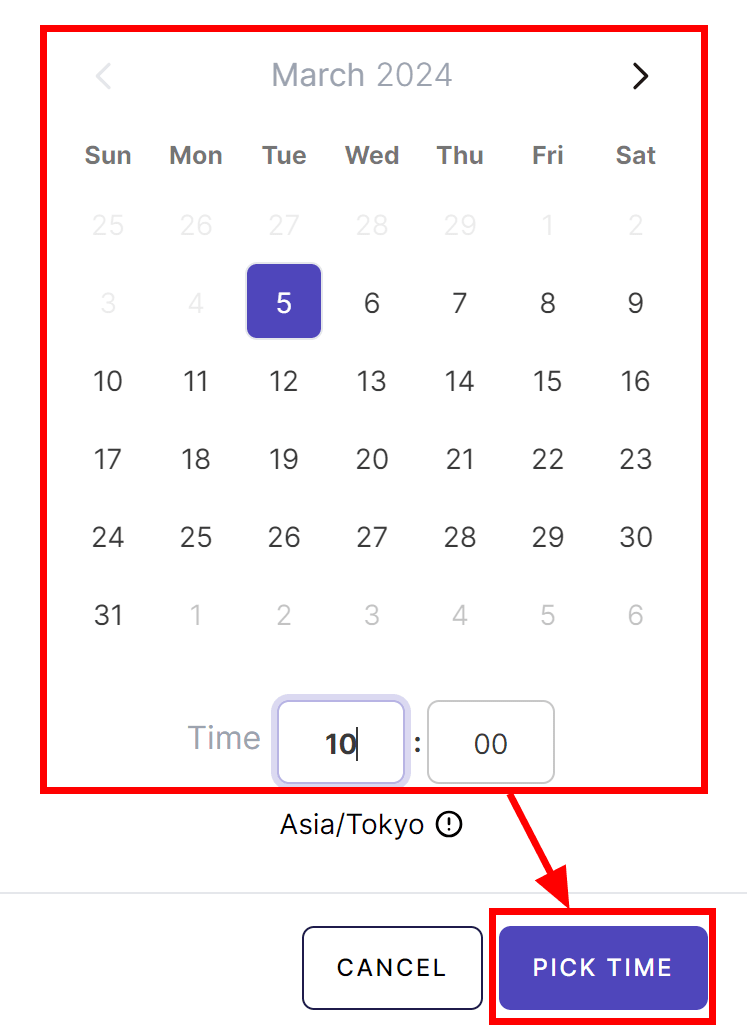
Select the date and time and then click Choose time.
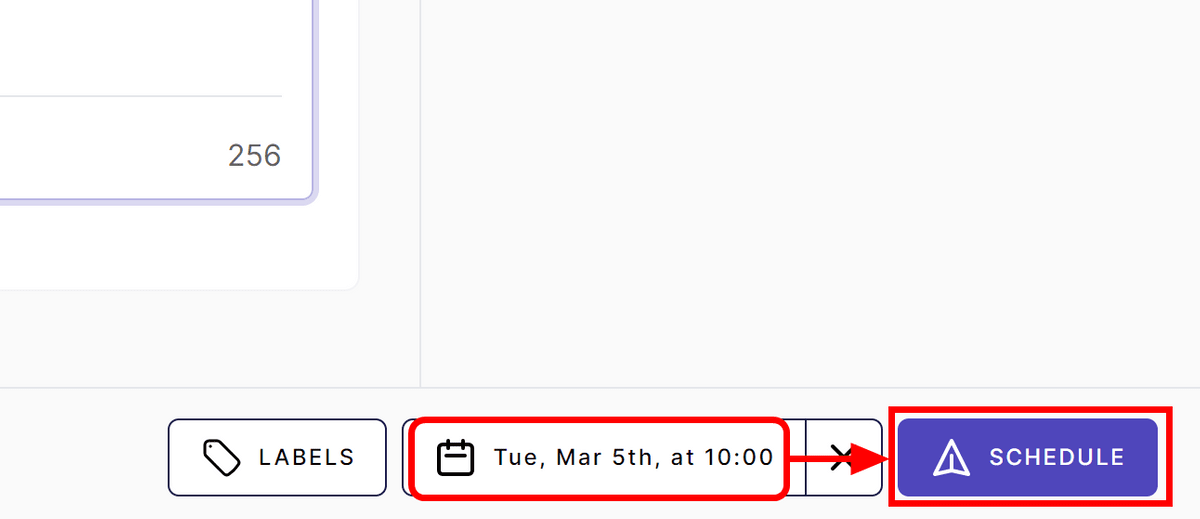
Check the time and click “Schedule”.
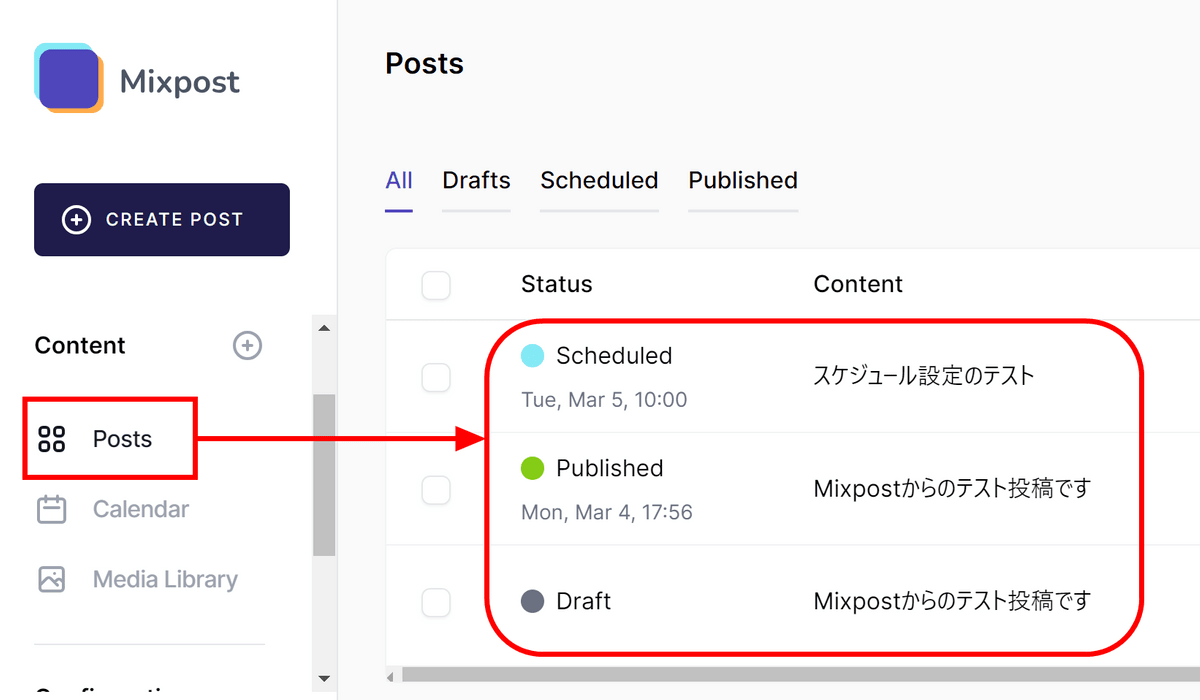
Click Posts to view a list of reserved, published, and draft content.
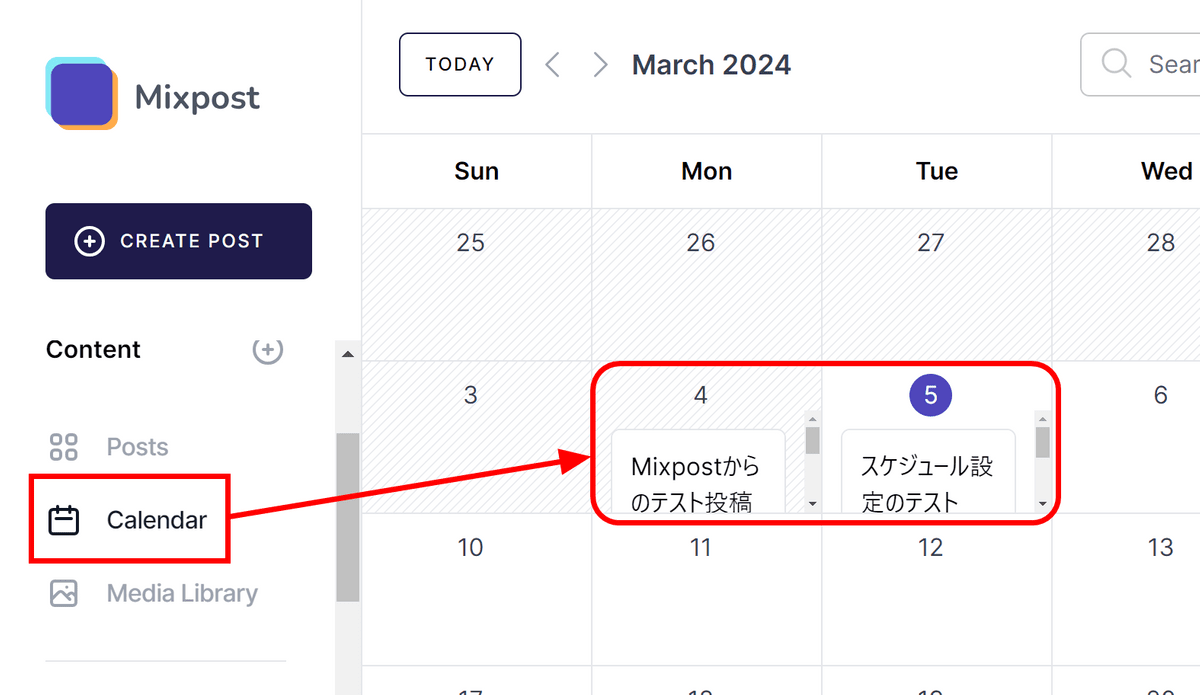
When you look at the Calendar, you can check the contents of the daily posting in calendar format.
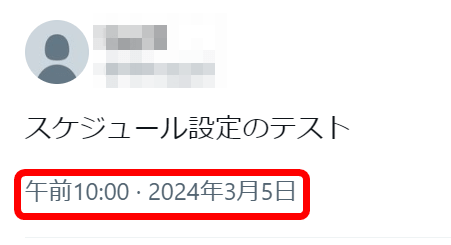
It will be posted automatically at the specified time.
Additionally, it is possible to “delete” a post by selecting the left side in the post list screen and clicking on the trash can sign, but this means “delete the post from Mixpost database”.
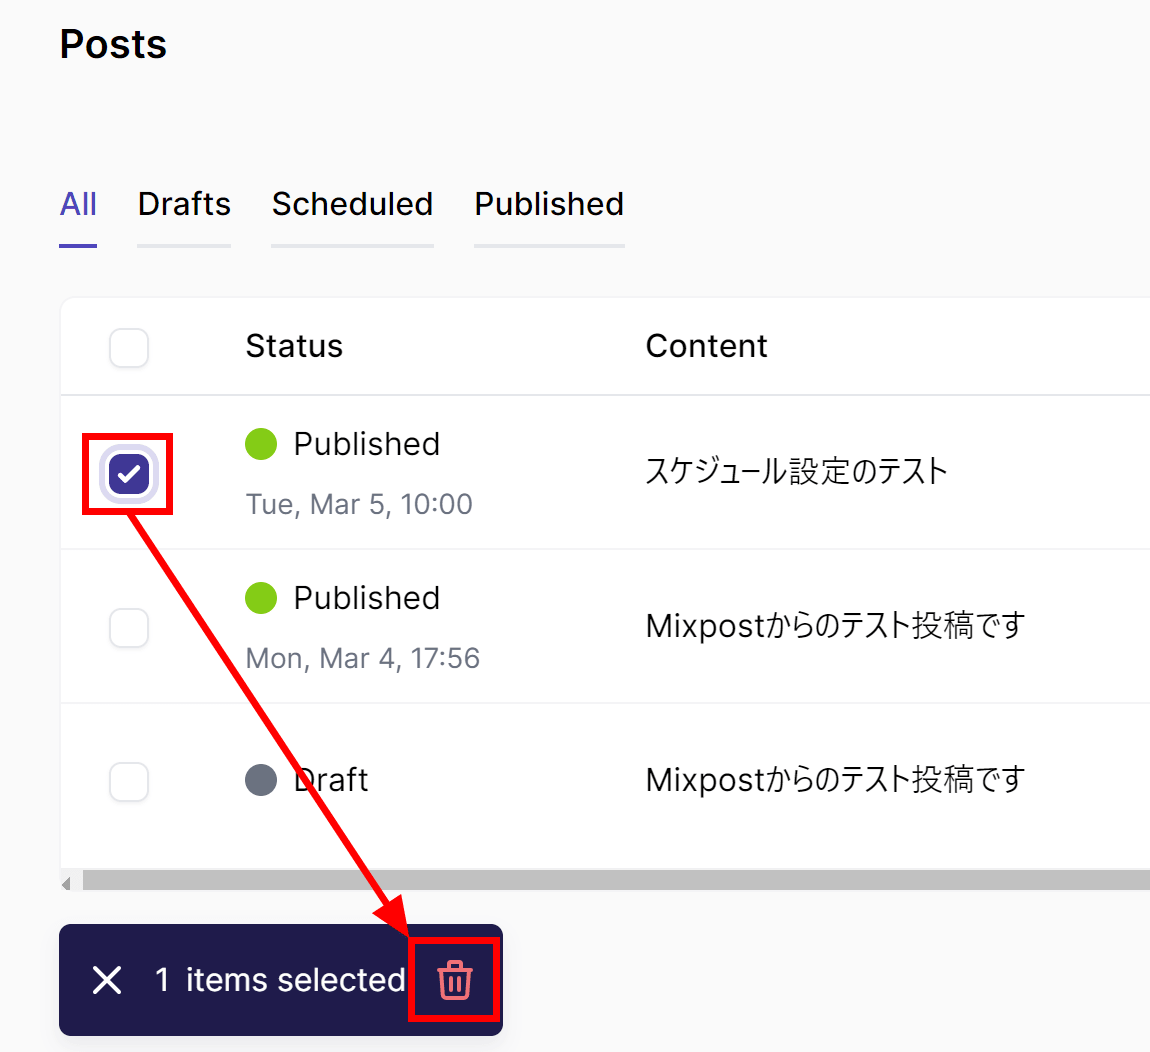
In order to delete already published content from SNS, it was necessary to perform operations on each SNS.

When you open the Dashboard, you can check the total number of Likes, Retweets, Impressions, etc. for the post.

You can also embed photos and movies by clicking the “Media” button at the bottom of the post screen.
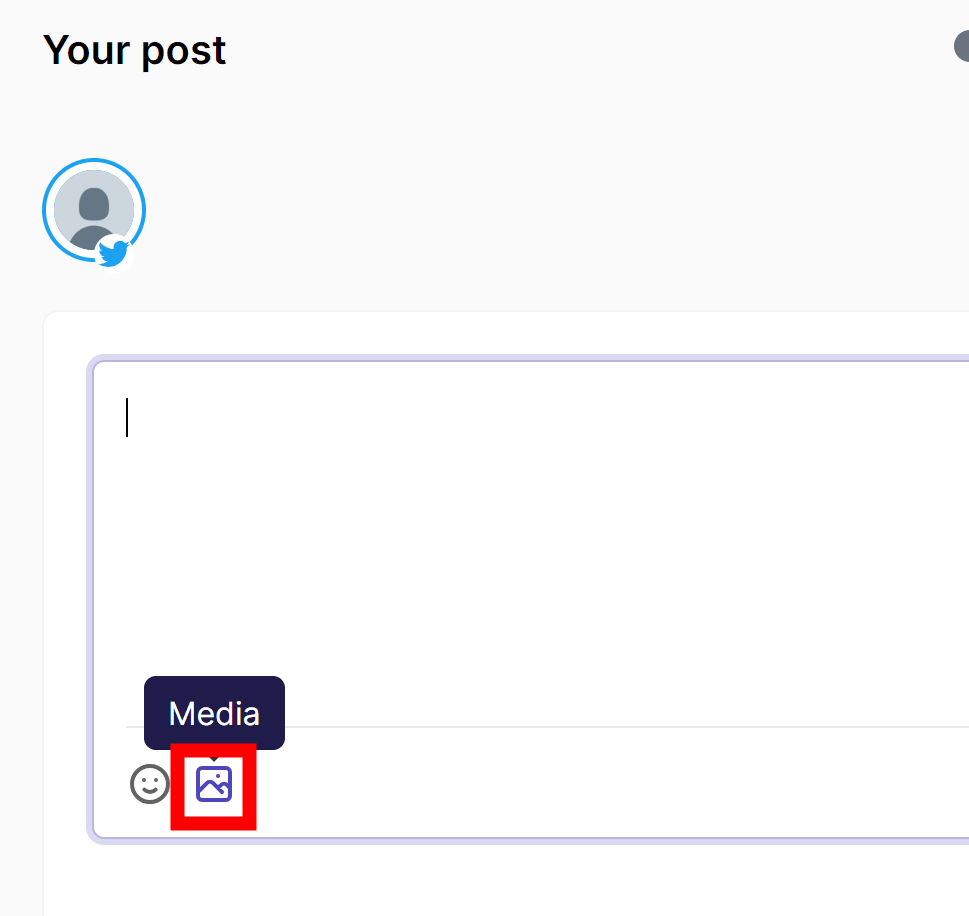
To upload your own files, simply drag and drop the movie or photo you want to publish into the area labeled “Drag and drop files here.” There is a 5MB limit per file.
In addition to the photos you haveUnsplashYou can also post uploaded photos to . To make initial settings, go to the Stock Images tab and click Click to configure.

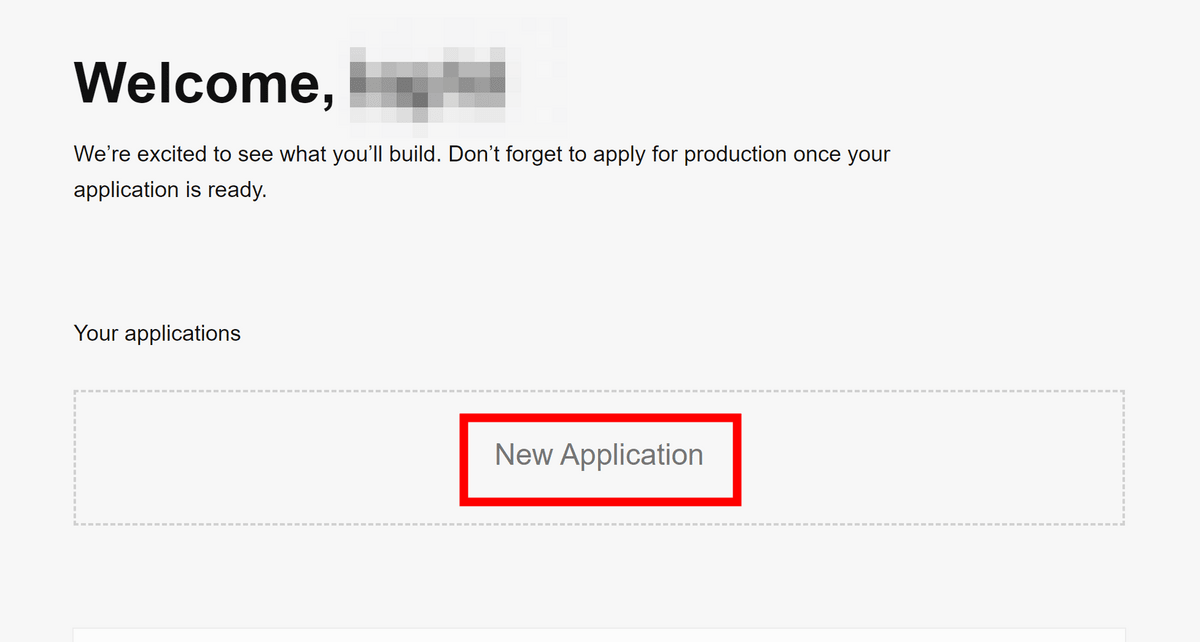
UnsplashWhile logged in, click “Create an App on Unsplash” under the “Unsplash” tab.

Click “New Application”.
Check everything and click “Accept the terms.”

Enter the app name and description and click “Create App”.

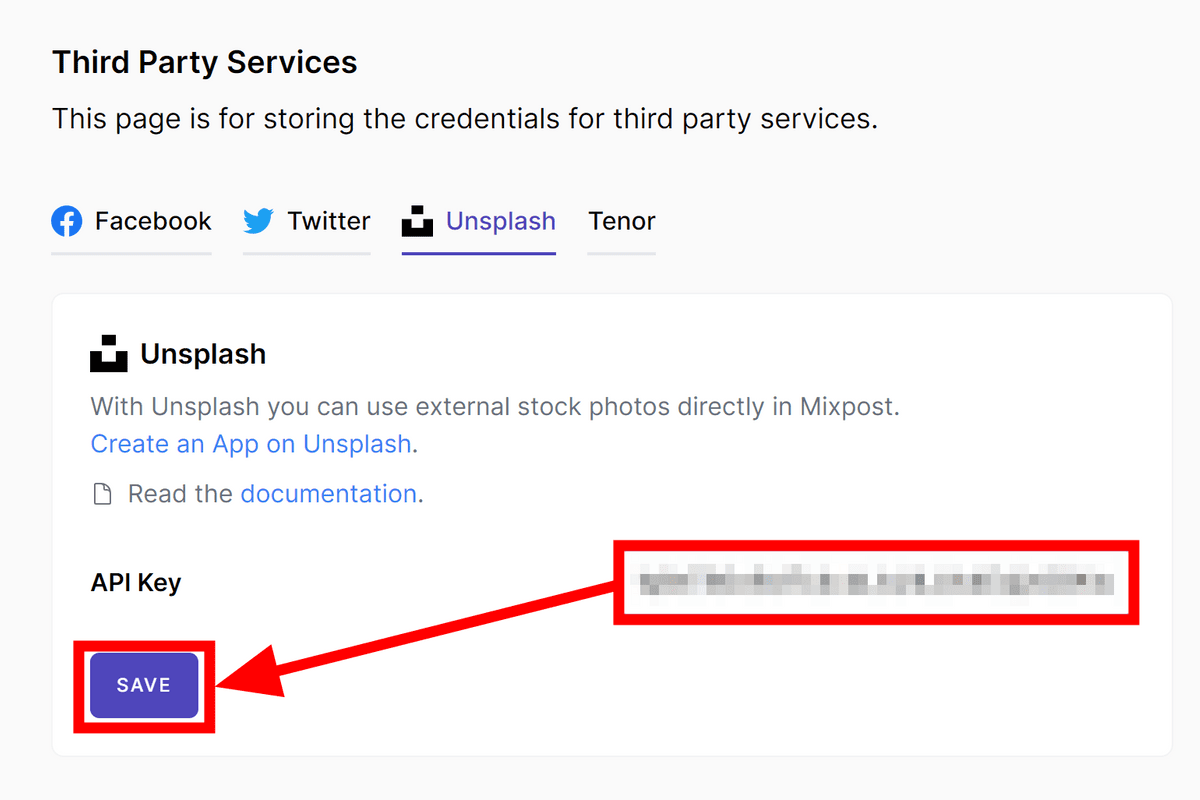
Copy the access key that will be displayed.

Return to the Mixpost screen, enter your access key in the API Key field, and click Save to complete setup.
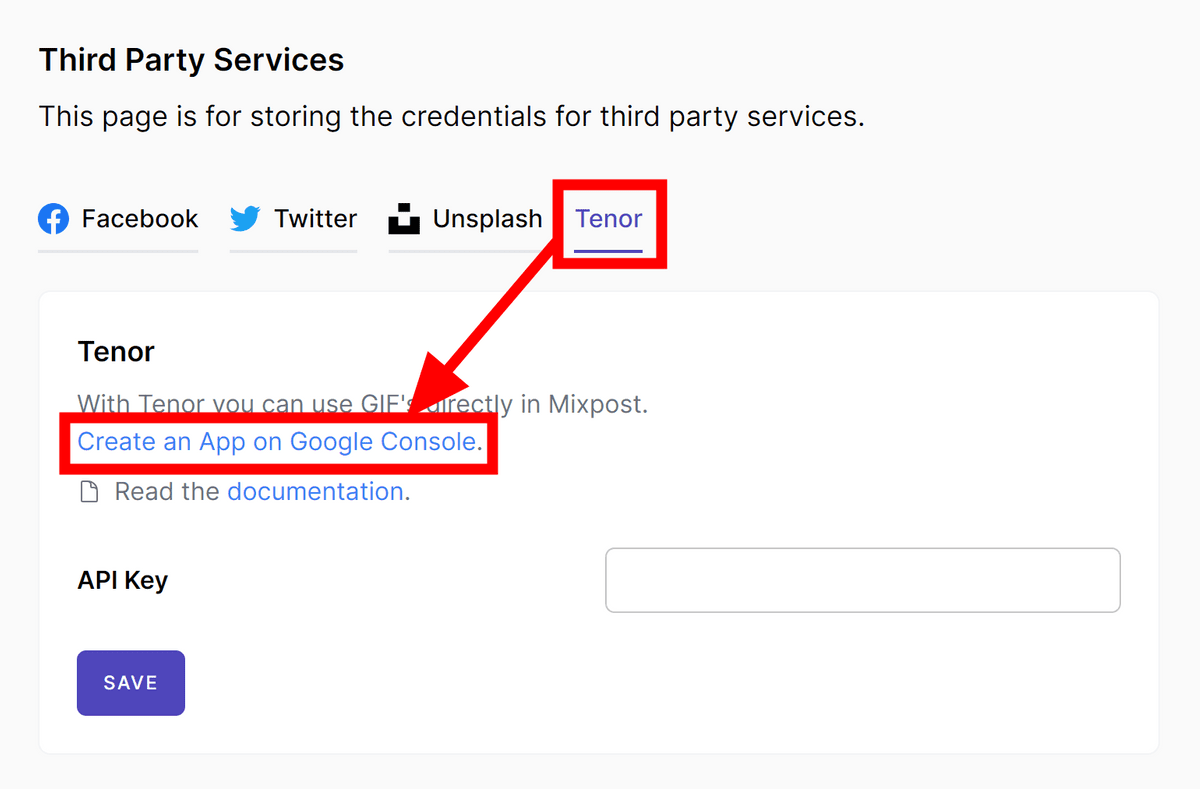
At the same time, we will also set up “Tenor”, which allows you to use GIFs.Google Cloud PlatformWhile logged in, click “Create a Google Console App” in the “Tenor” column.
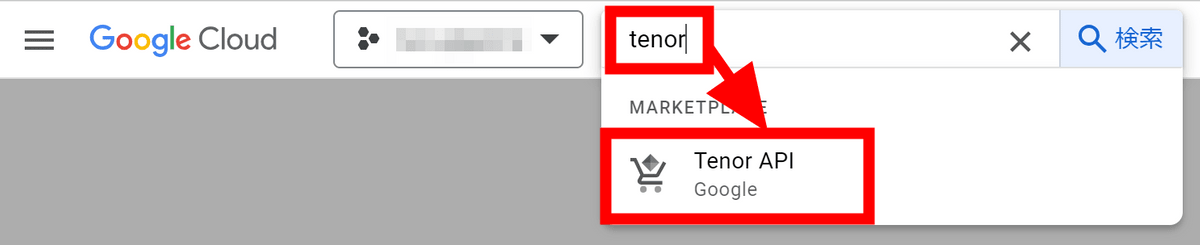
Enter “tenor” in the search window and click “Tenor API”.
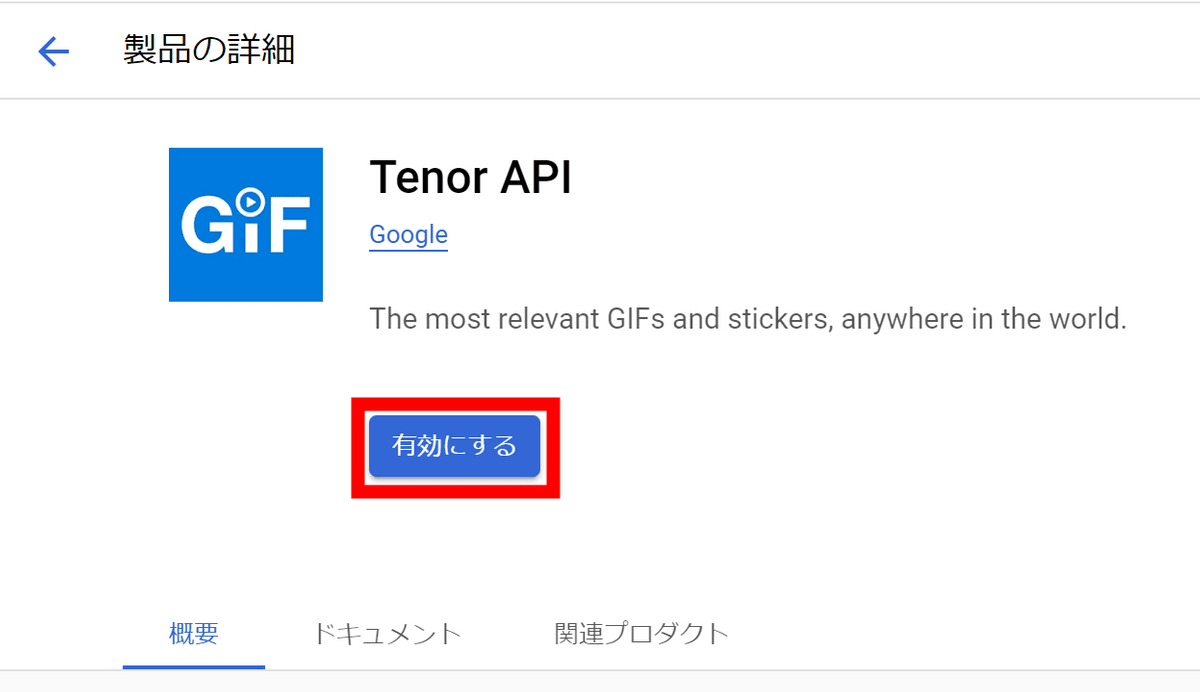
Click “Enable”.
Click “Credentials” in the side menu.

Click “Create Credentials” and then “API Key”.

Copy the API key that will be displayed.

Return to the Mixpost screen, paste it into the “API Key” field and click “Save”.

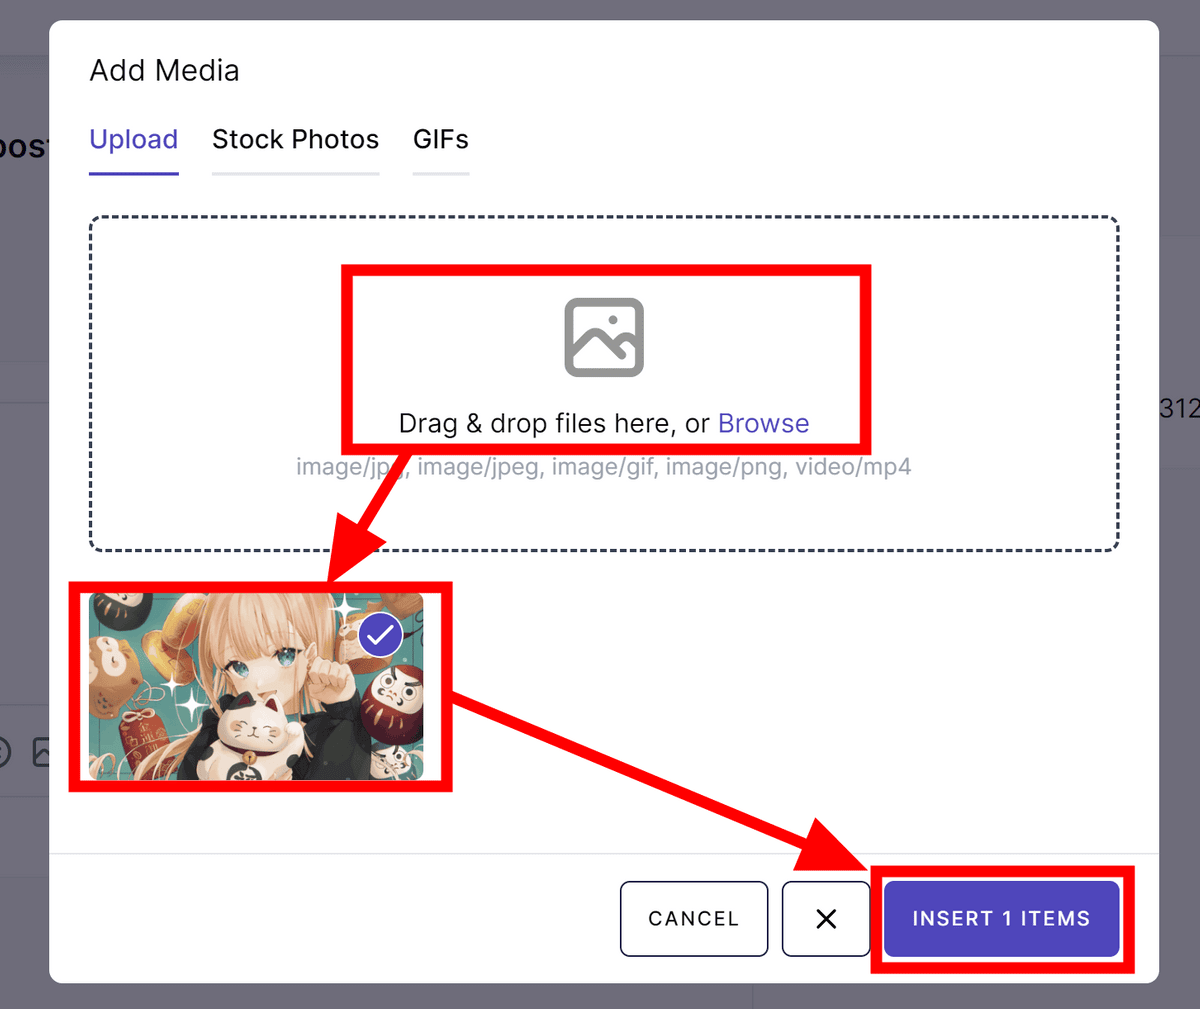
You can now select Unsplash and Tenor images on the Add Media screen. Click “Stock Photos” and enter your search characters to view Unsplash search results. Check the images you want to use and click “INSERT 1 ITEMS”.

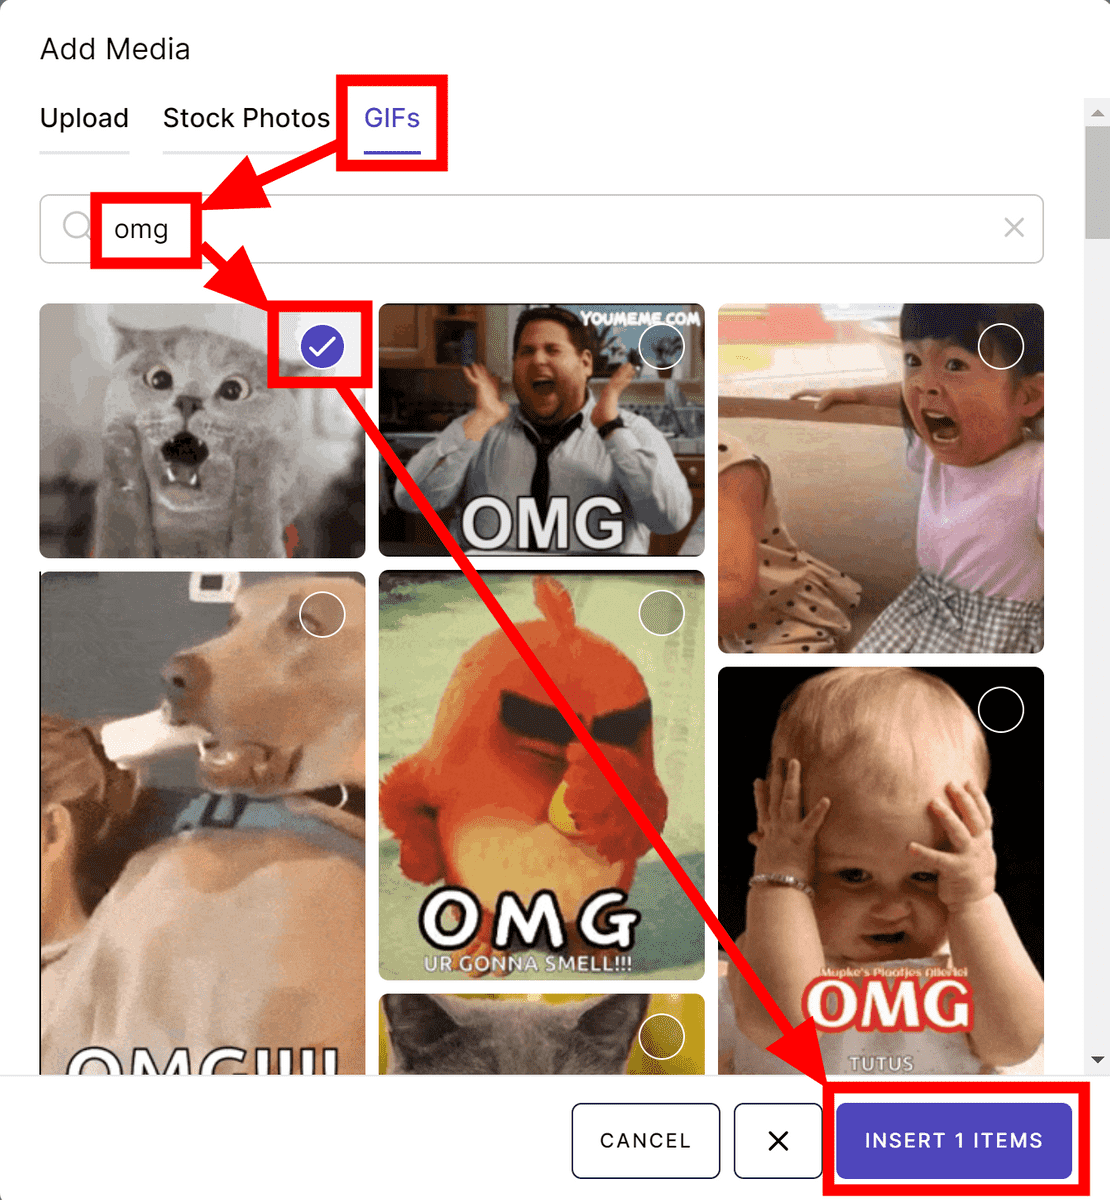
If you want to insert a GIF, you can do the same process in the GIFs tab.
You can attach multiple media to a single post, but an error message will appear if the post contains media that cannot be used at the same time due to limitations on the publishing destination service.

In addition, in the free version, you can only add Facebook, X and Mastodon accounts;PRO versionWith your purchase, you will be able to post to Instagram, LinkedIn, Pinterest, TikTok, YouTube, and YouTube Shorts at the same time. Please note that you can only receive continuous updates for one year after purchase.
Copy the title and URL of this article

“Travel maven. Beer expert. Subtly charming alcohol fan. Internet junkie. Avid bacon scholar.”
More Stories
It's better to call it a digital camera. The Xperia 1 VI lets you take any kind of photo | Gizmodo Japan
Google may be developing a new device called “Google TV Streamer” to replace “Chromecast”
What do you want to talk about? “Persona 3 Reload” recommendation campaign is running until July 31st! |.Persona Channel